fitness

All things fitness: free full workout videos and exercise cheat-sheets and how-to’s designed by certified fitness trainer/creator of Mind Body Badass Amy Baack.

  • My 5 Favorite San Diego Fitness Studios

    San Diego

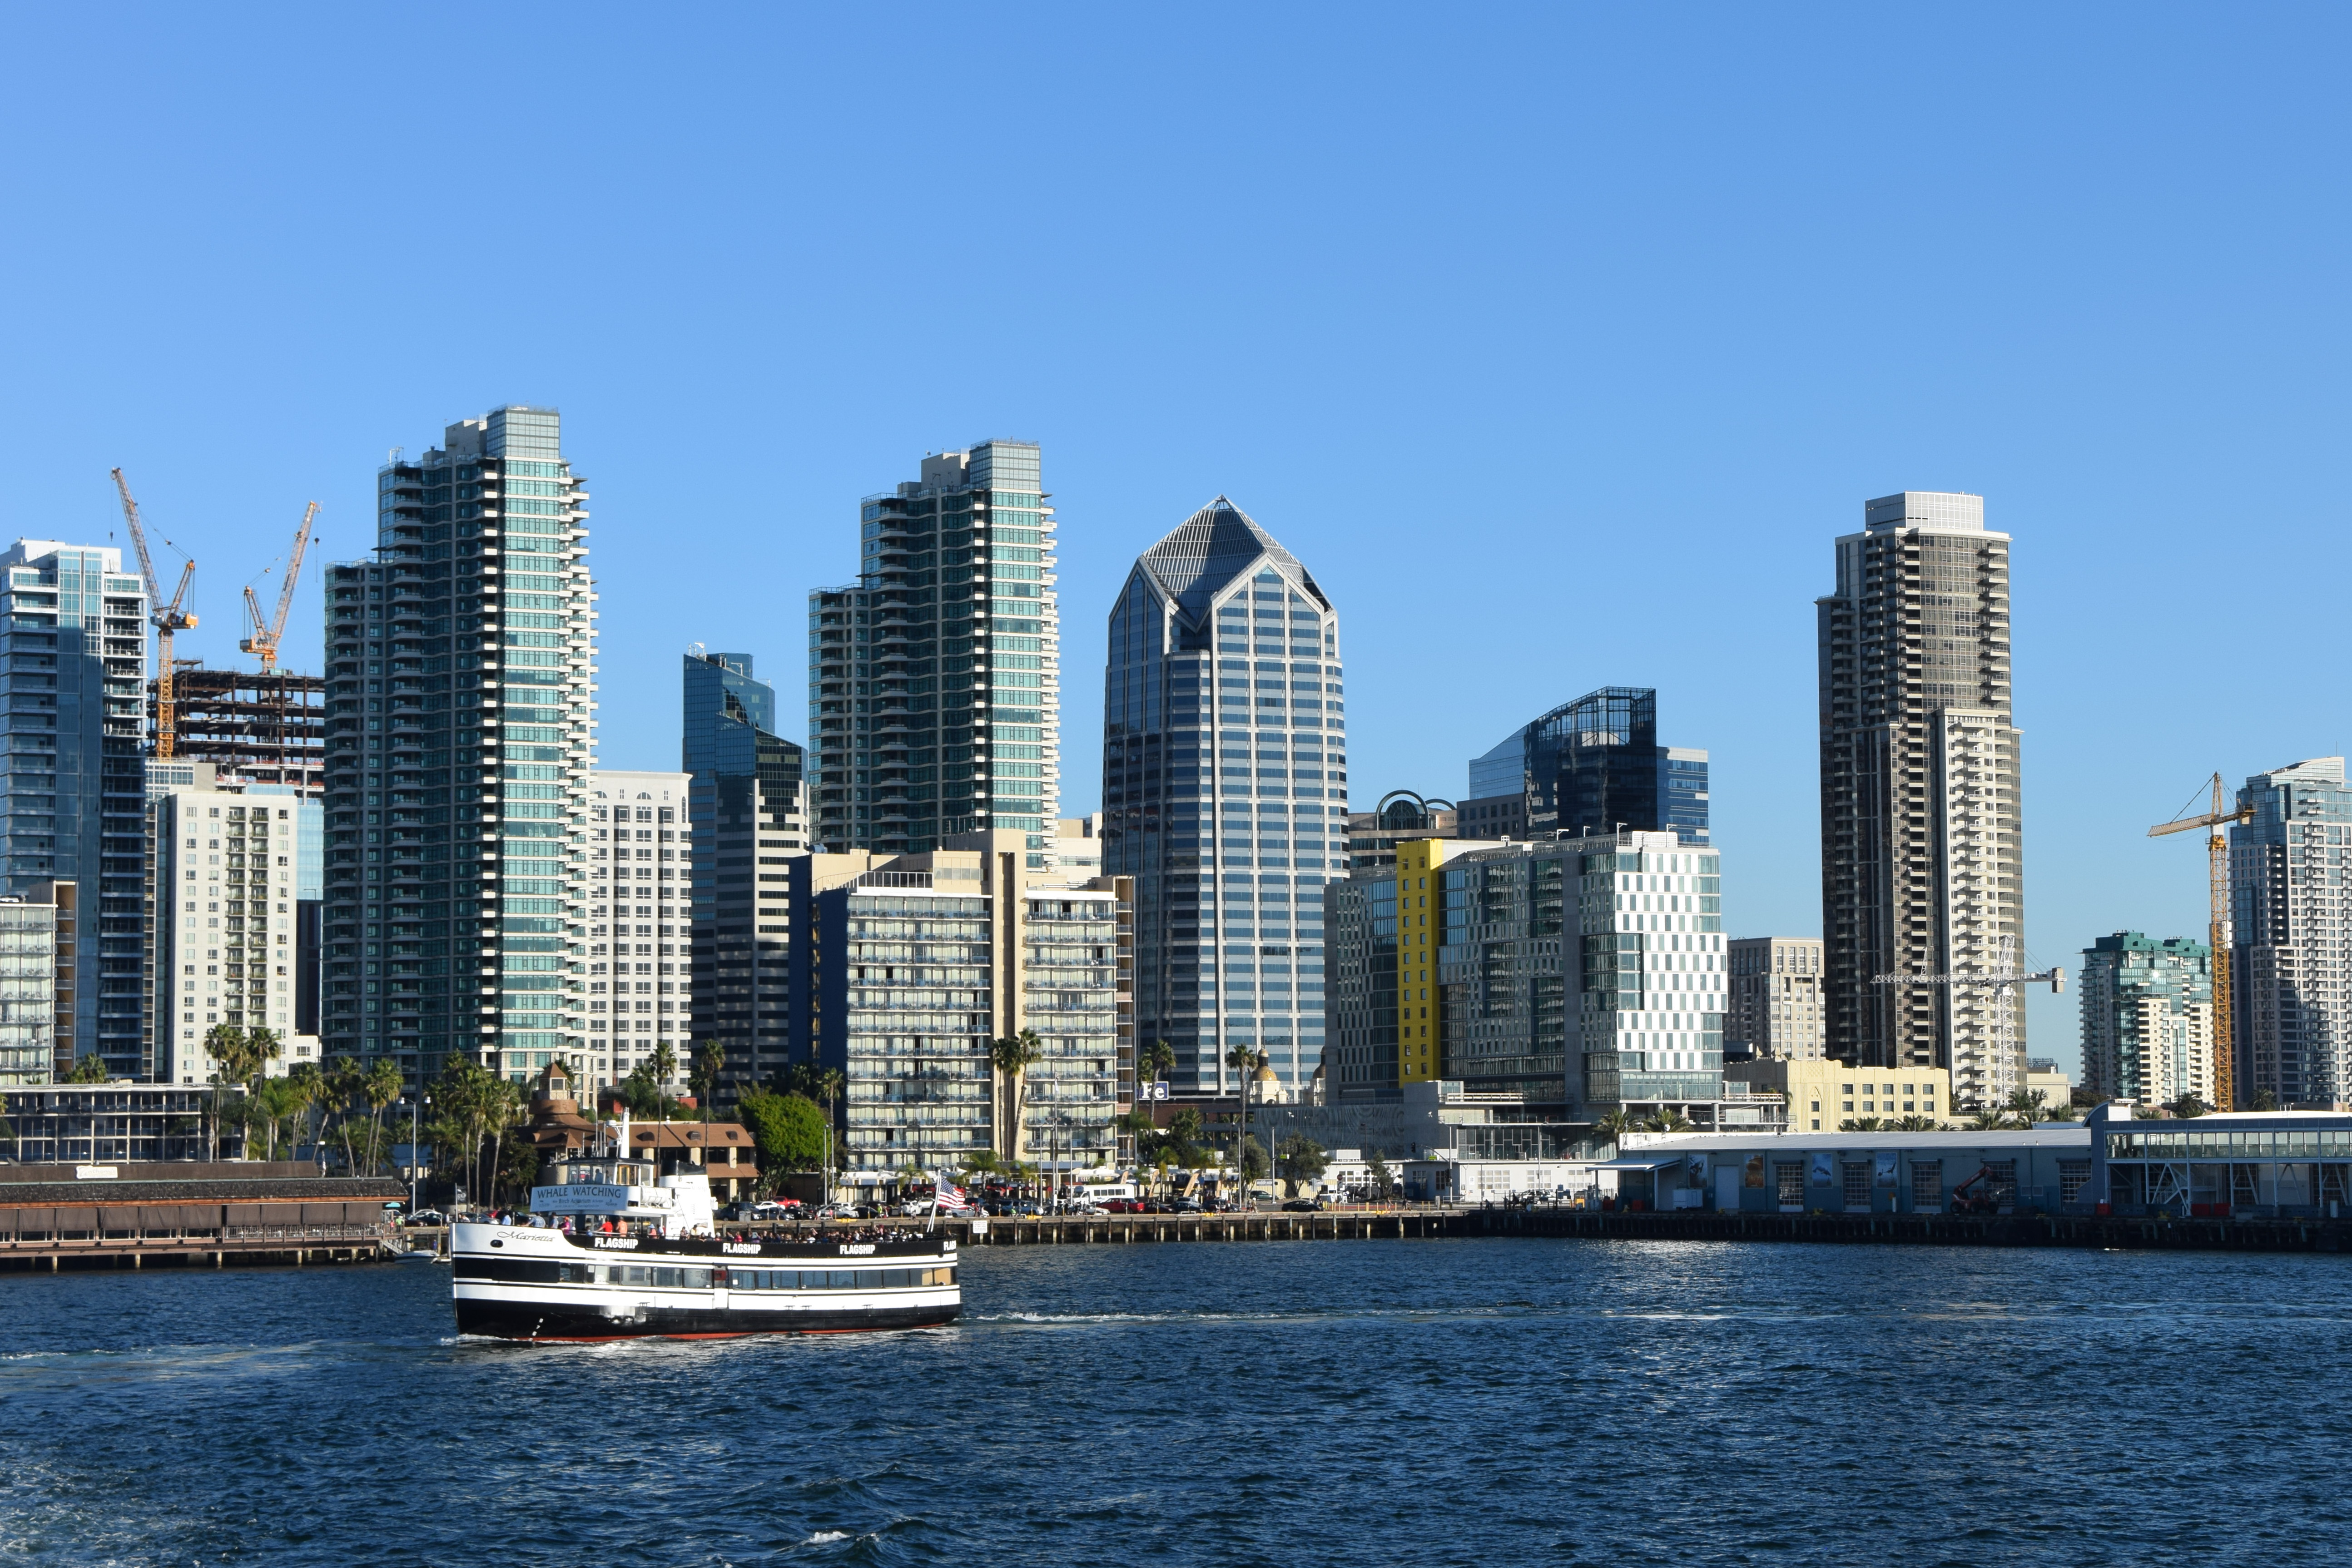
    San Diego is quickly becoming a major fitness hub.

    In fact, in 2017 San Diego was ranked as the 10th fittest city in the nation according to the American College of Sports Medicine. And yes, a huge portion of that healthy success is due to the incredible weather and easy access to every outdoor sport imaginable. But it’s also clear that San Diego is slowly becoming a major player in the boutique fitness studio scene, as well.

    I’ve been a little absent from the blog this past week due to my gross underestimation of just how much work I can actually physically accomplish in a day. I’m currently in San Diego visiting my husband, who was out there for the month of October for training. I spent a week guest teaching spin and working remotely with my social media job. Now we’re heading to Palm Springs tomorrow to go back to the resort where we got married for a relaxing weekend. I’m so ready — I’ve been hit with some heavy life shit recently and am honestly feeling overwhelmed and in need of a vacation.

    I miss San Diego a lot.

    I just moved to Honolulu (thanks to my husband’s military orders) in March after living in San Diego for three years. I’m not gonna lie, it’s been real lonely over on my little Hawaiian island. There’s a “getting to know you” period when you move where you don’t have a network of friends and have no idea where anything is. I’m finally sort of starting to settle in, get familiar with the layout of Oahu, and explore as much as possible, but it’s just not quite my scene. The vibe is off. It’s absolutely beautiful, but I know it’s not where I belong. I long for California daily.

    San Diego is where I underwent my own personal wellness transformation and became a fitness instructor. I taught at so many of the studios around town. It really feels like home. All my readers from San Diego (and especially those of you that are my former clients!!! xo), I LOVE YOU. Seriously, San Diego is probably the most beautiful and positive city in America. I know Seattle and Portland will argue with me, but San Diego wins in my book. It’s a place where you feel (or you should feel) truly blessed to live there.

    And San Diego’s fitness scene is super impressive.

    San Diego easily has some of the best studios and instructors I’ve ever met. Just based on my personal observations and experiences in the industry (i.e., based on literally nothing but my opinion), I would rank the current order of Top Boutique Fitness Cities as follows: New York, LA, San Francisco, and D.C. Now San Diego is starting to keep up (along with lots of other major U.S. cities) in the fitness scene with those major players.

    Let’s talk about my Top 5 Favorite Fitness Studios to workout at in San Diego.

    And I have to admit: I’m like 1000% biased here. Okay? This is not an objective ranking – but who wants an objective ranking, anyway? I always prefer recommendations from my friends when I need to know where to go. So yes. This is just my biased opinion. Plus I taught at all these studios.

    But I want to explain to you why I loved them all so much that I decided to teach THERE. I took classes at like every studio all over San Diego, so I know the fitness landscape there very, very well. And I fell in love with a handful of studios (I’m pretty picky), so I chose to work for them – and I loved all my experiences there.

    If you live in San Diego or travel there and need a good spot to get an amazing workout, definitely check out these fitness studios!

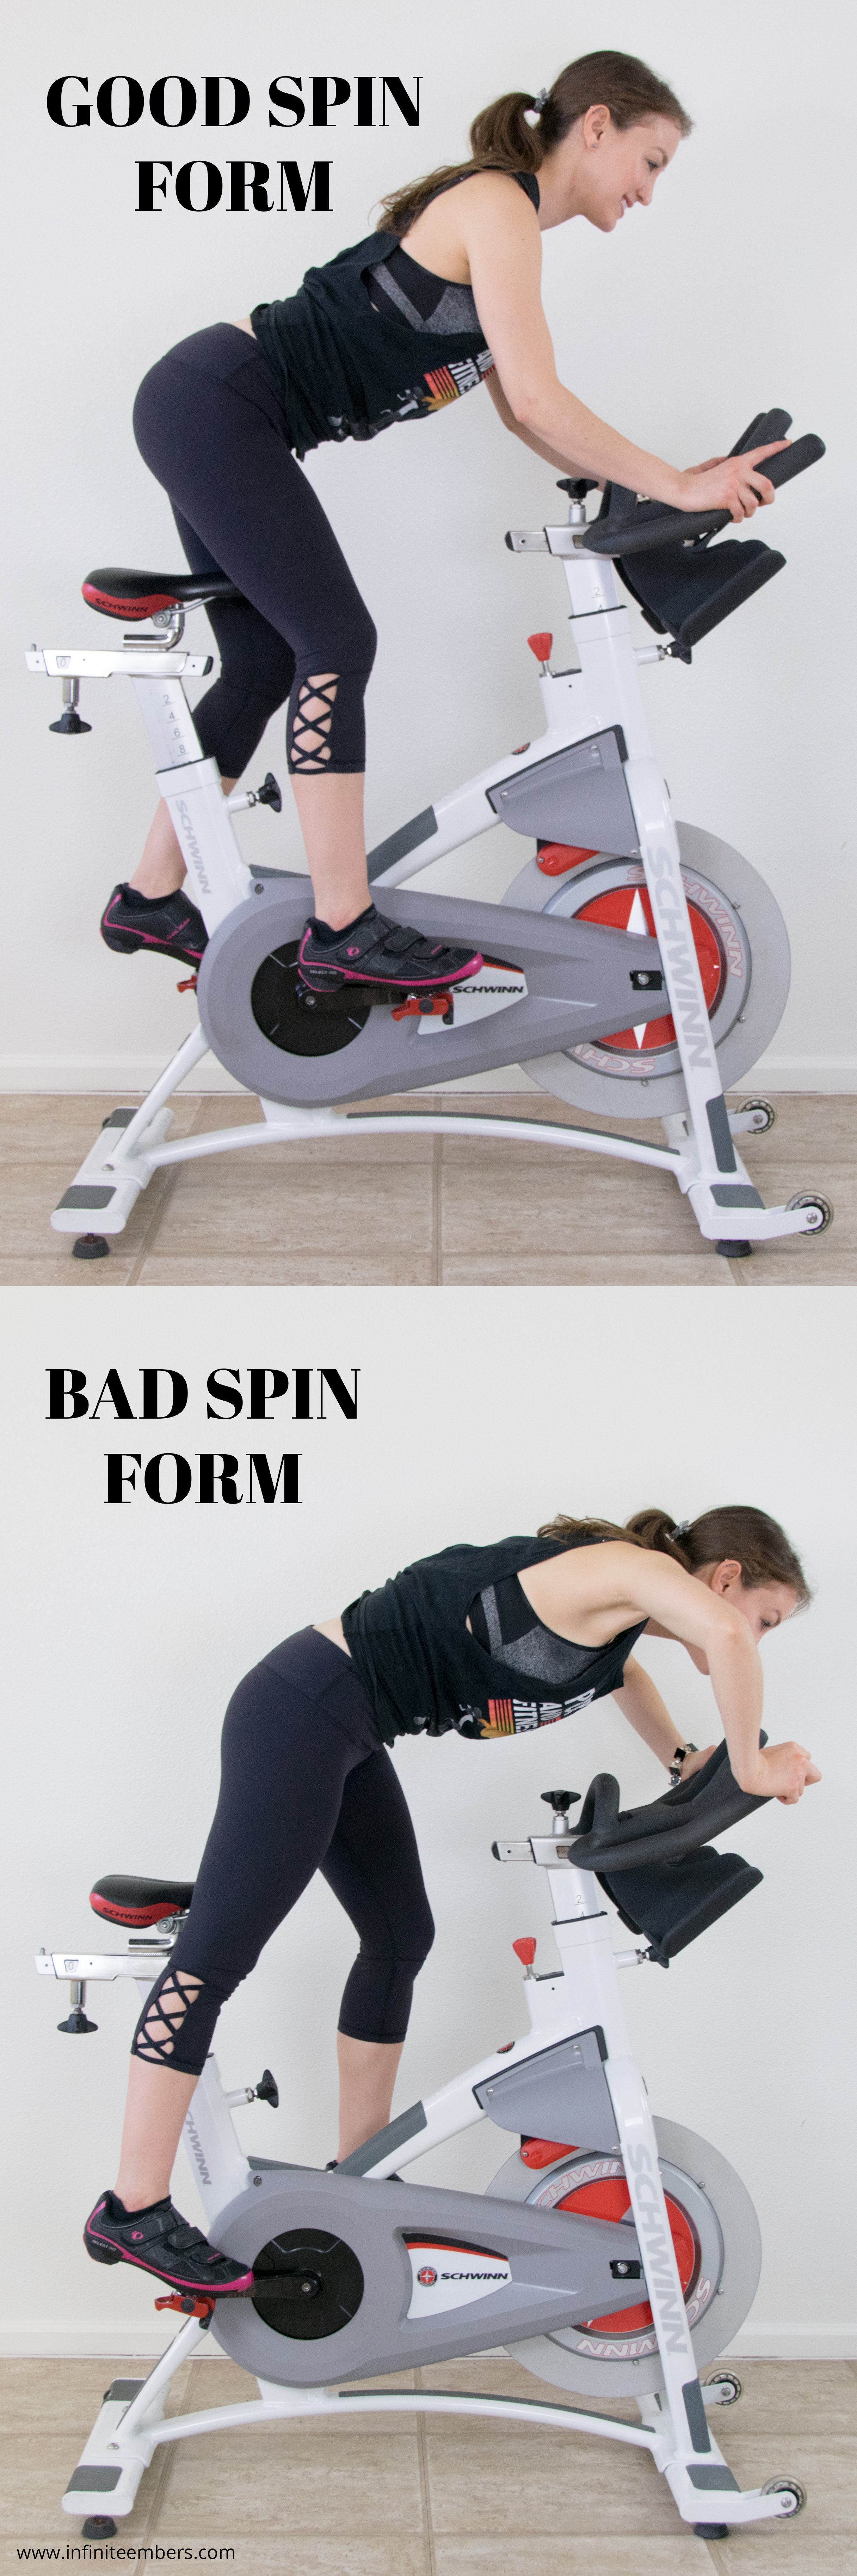
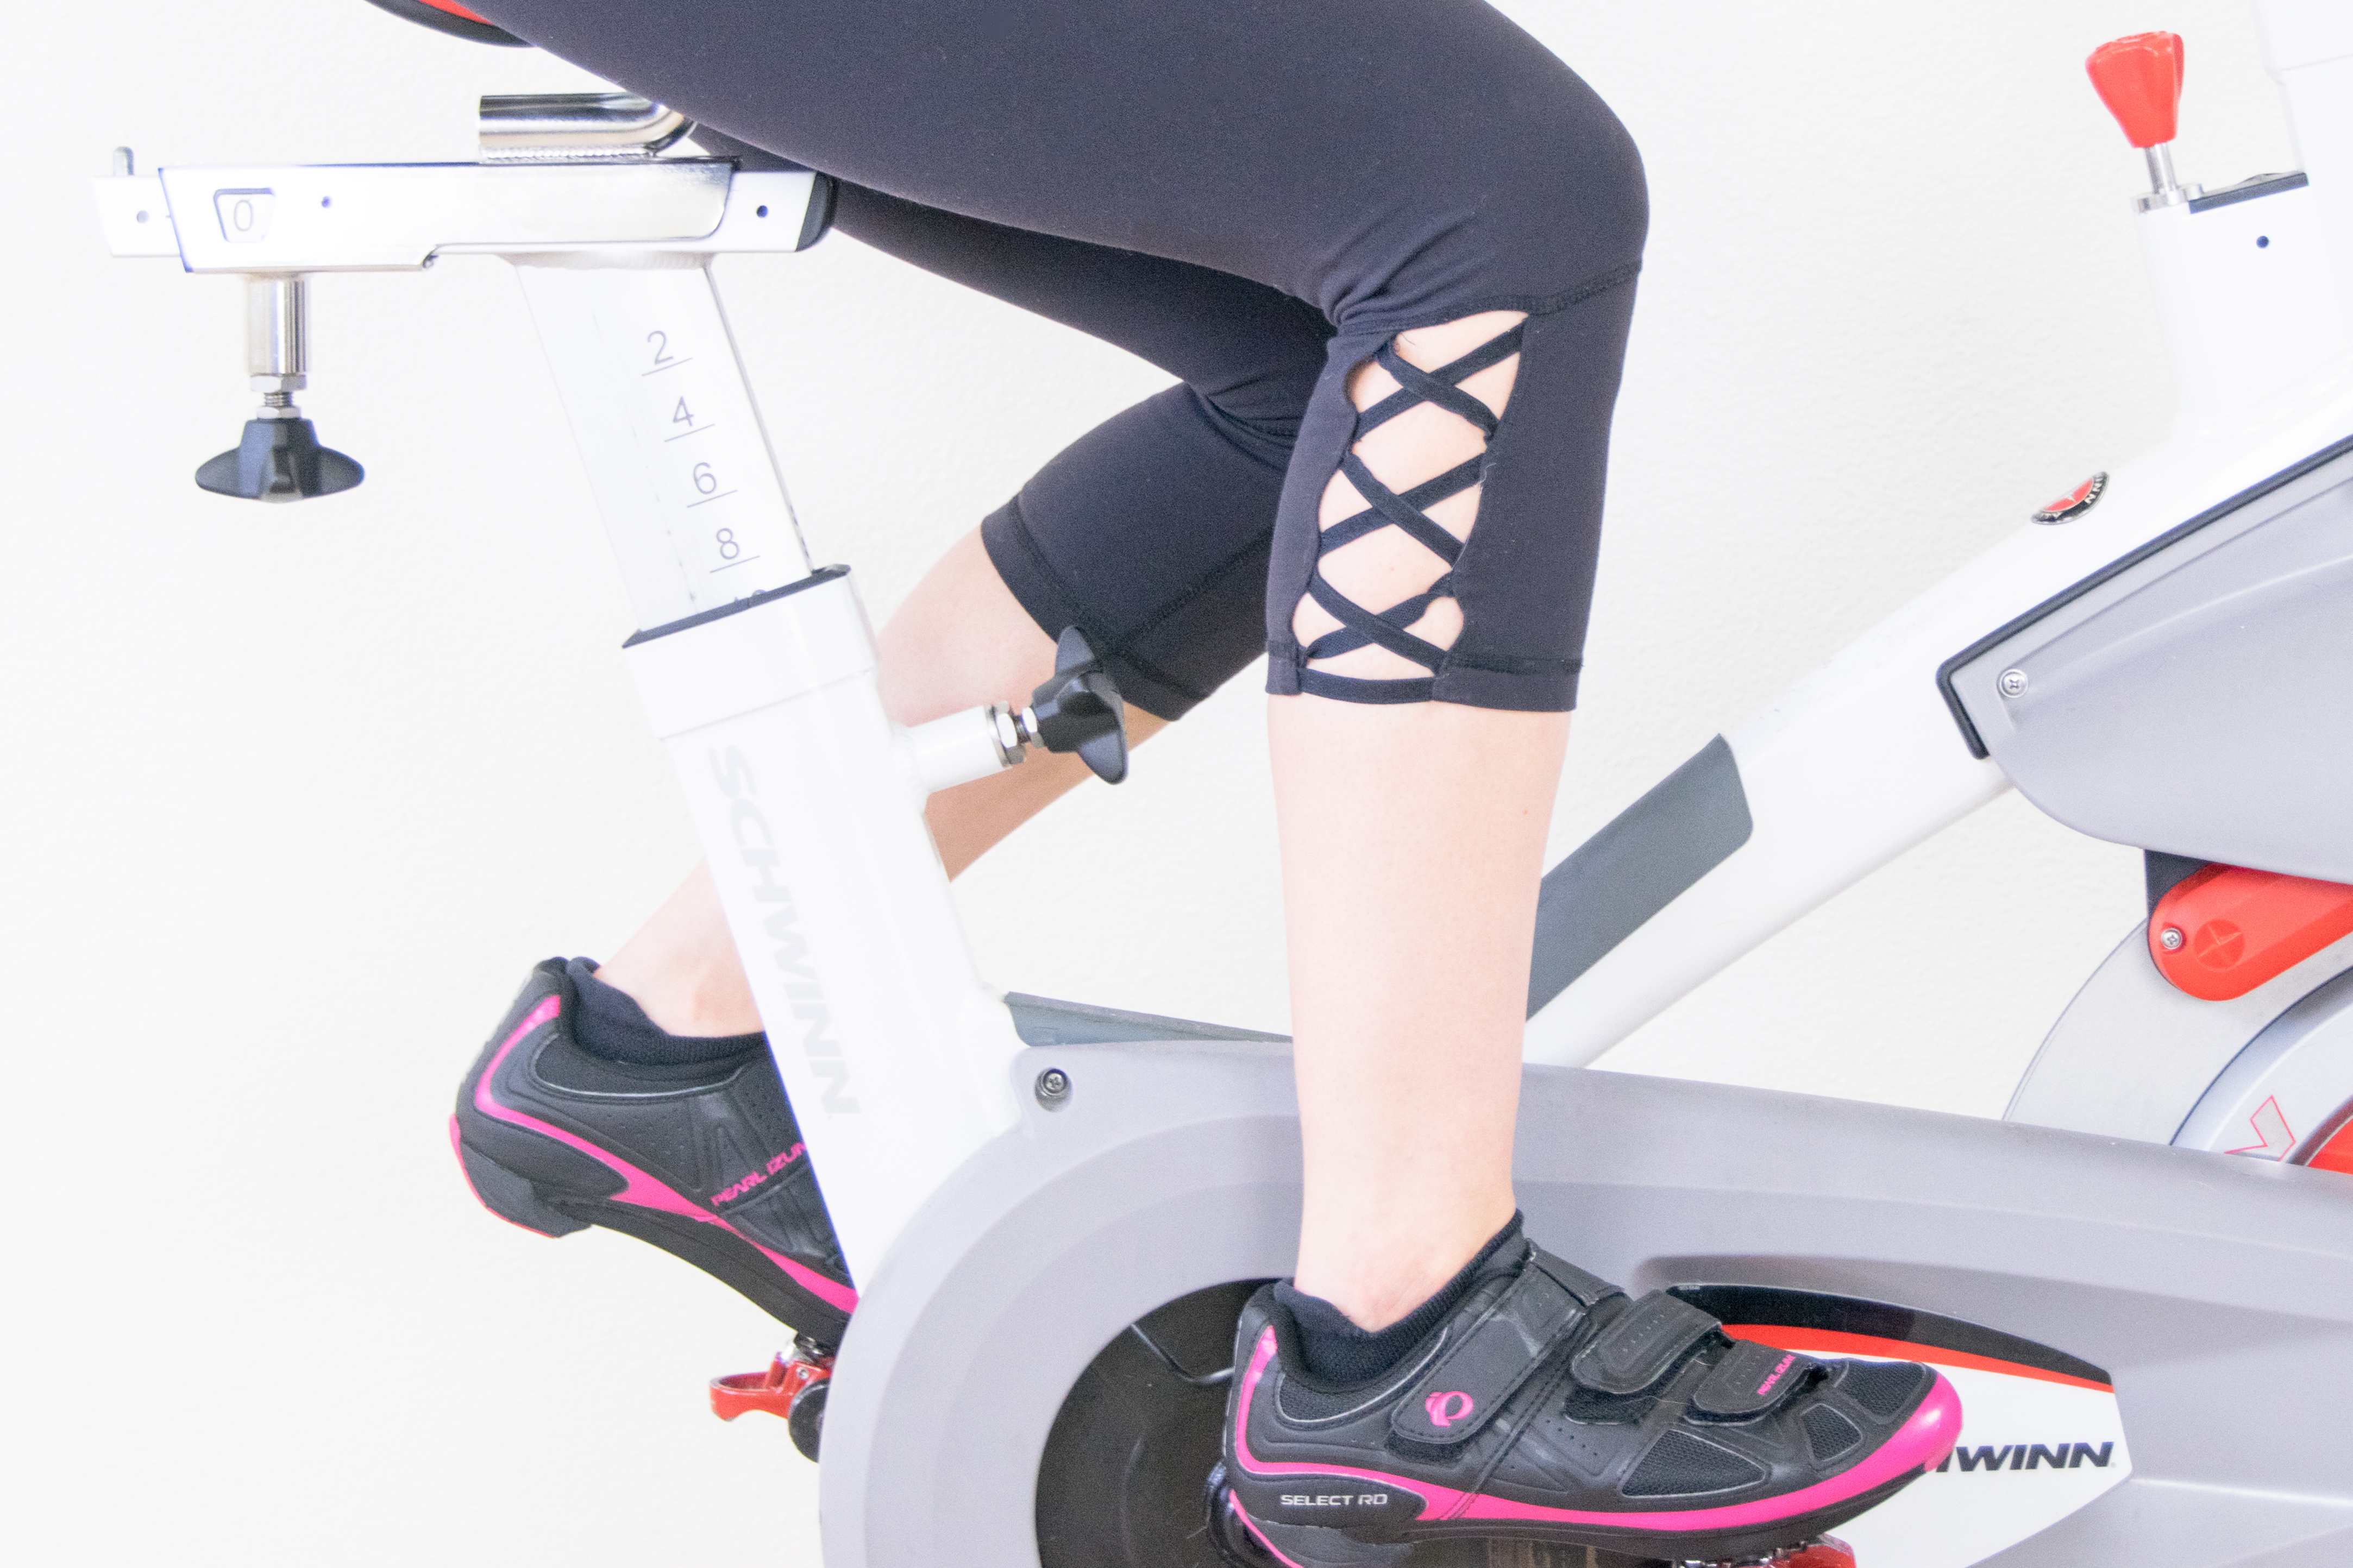
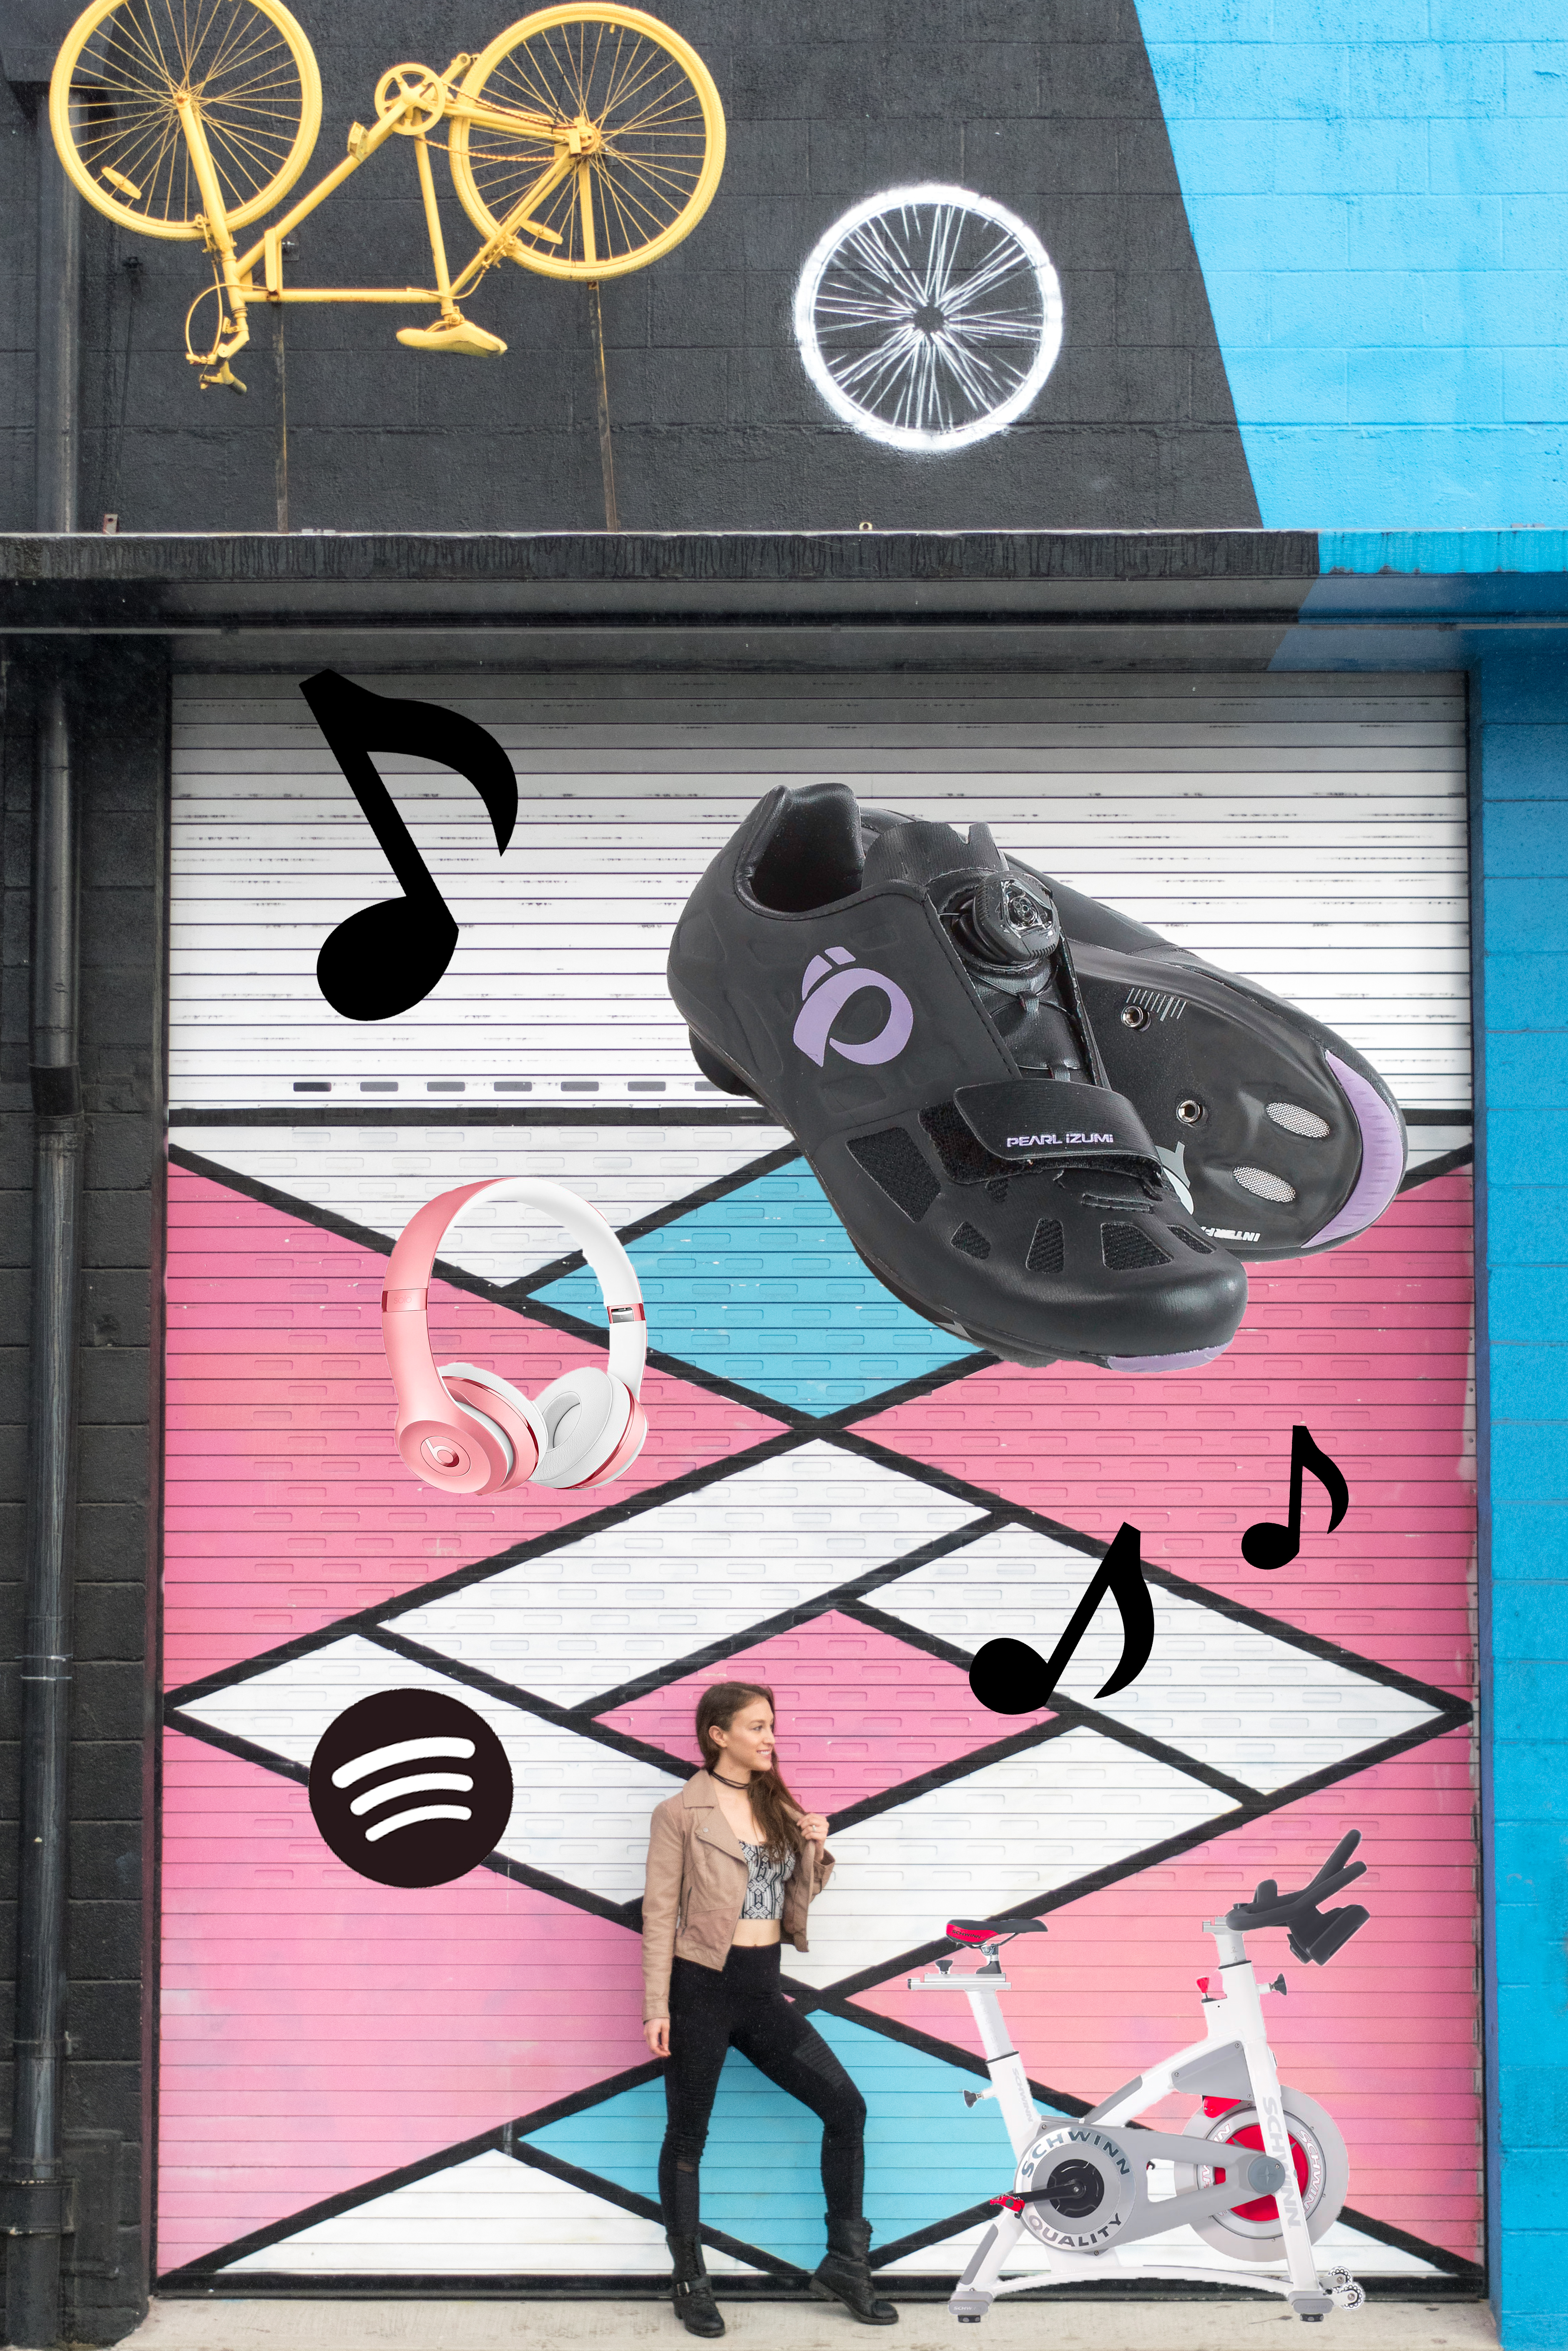
    1 » PURE Indoor Cycling

    Pure Indoor Cycling » Best San Diego Fitness Studios » From the Infinite Embers blog

    » PURE Indoor Cycling «

    I love my former spin studio! I was able to guest teach four classes at PURE while I was here and it just made my life. This sleek studio in downtown San Diego is the most thoughtfully designed space I’ve ever seen: from the blue lounge chairs to the hair and makeup bar in the women’s restroom, everything has a branded feel that is fresh, cool, and fun. They offer two types of indoor cycling classes: the Rhythm style where you ride to the beat of the music and “dance” on your bike, and Power classes that use a monitor to track your stats in a more traditional spin style. You know I’m the bike party type. 😉 They also have an amazing selection of chic workout attire and spin shoes in their boutique area.  I recommend you go take a class from the owner, Maria — plus, your first class is free if you’re a San Diego resident!

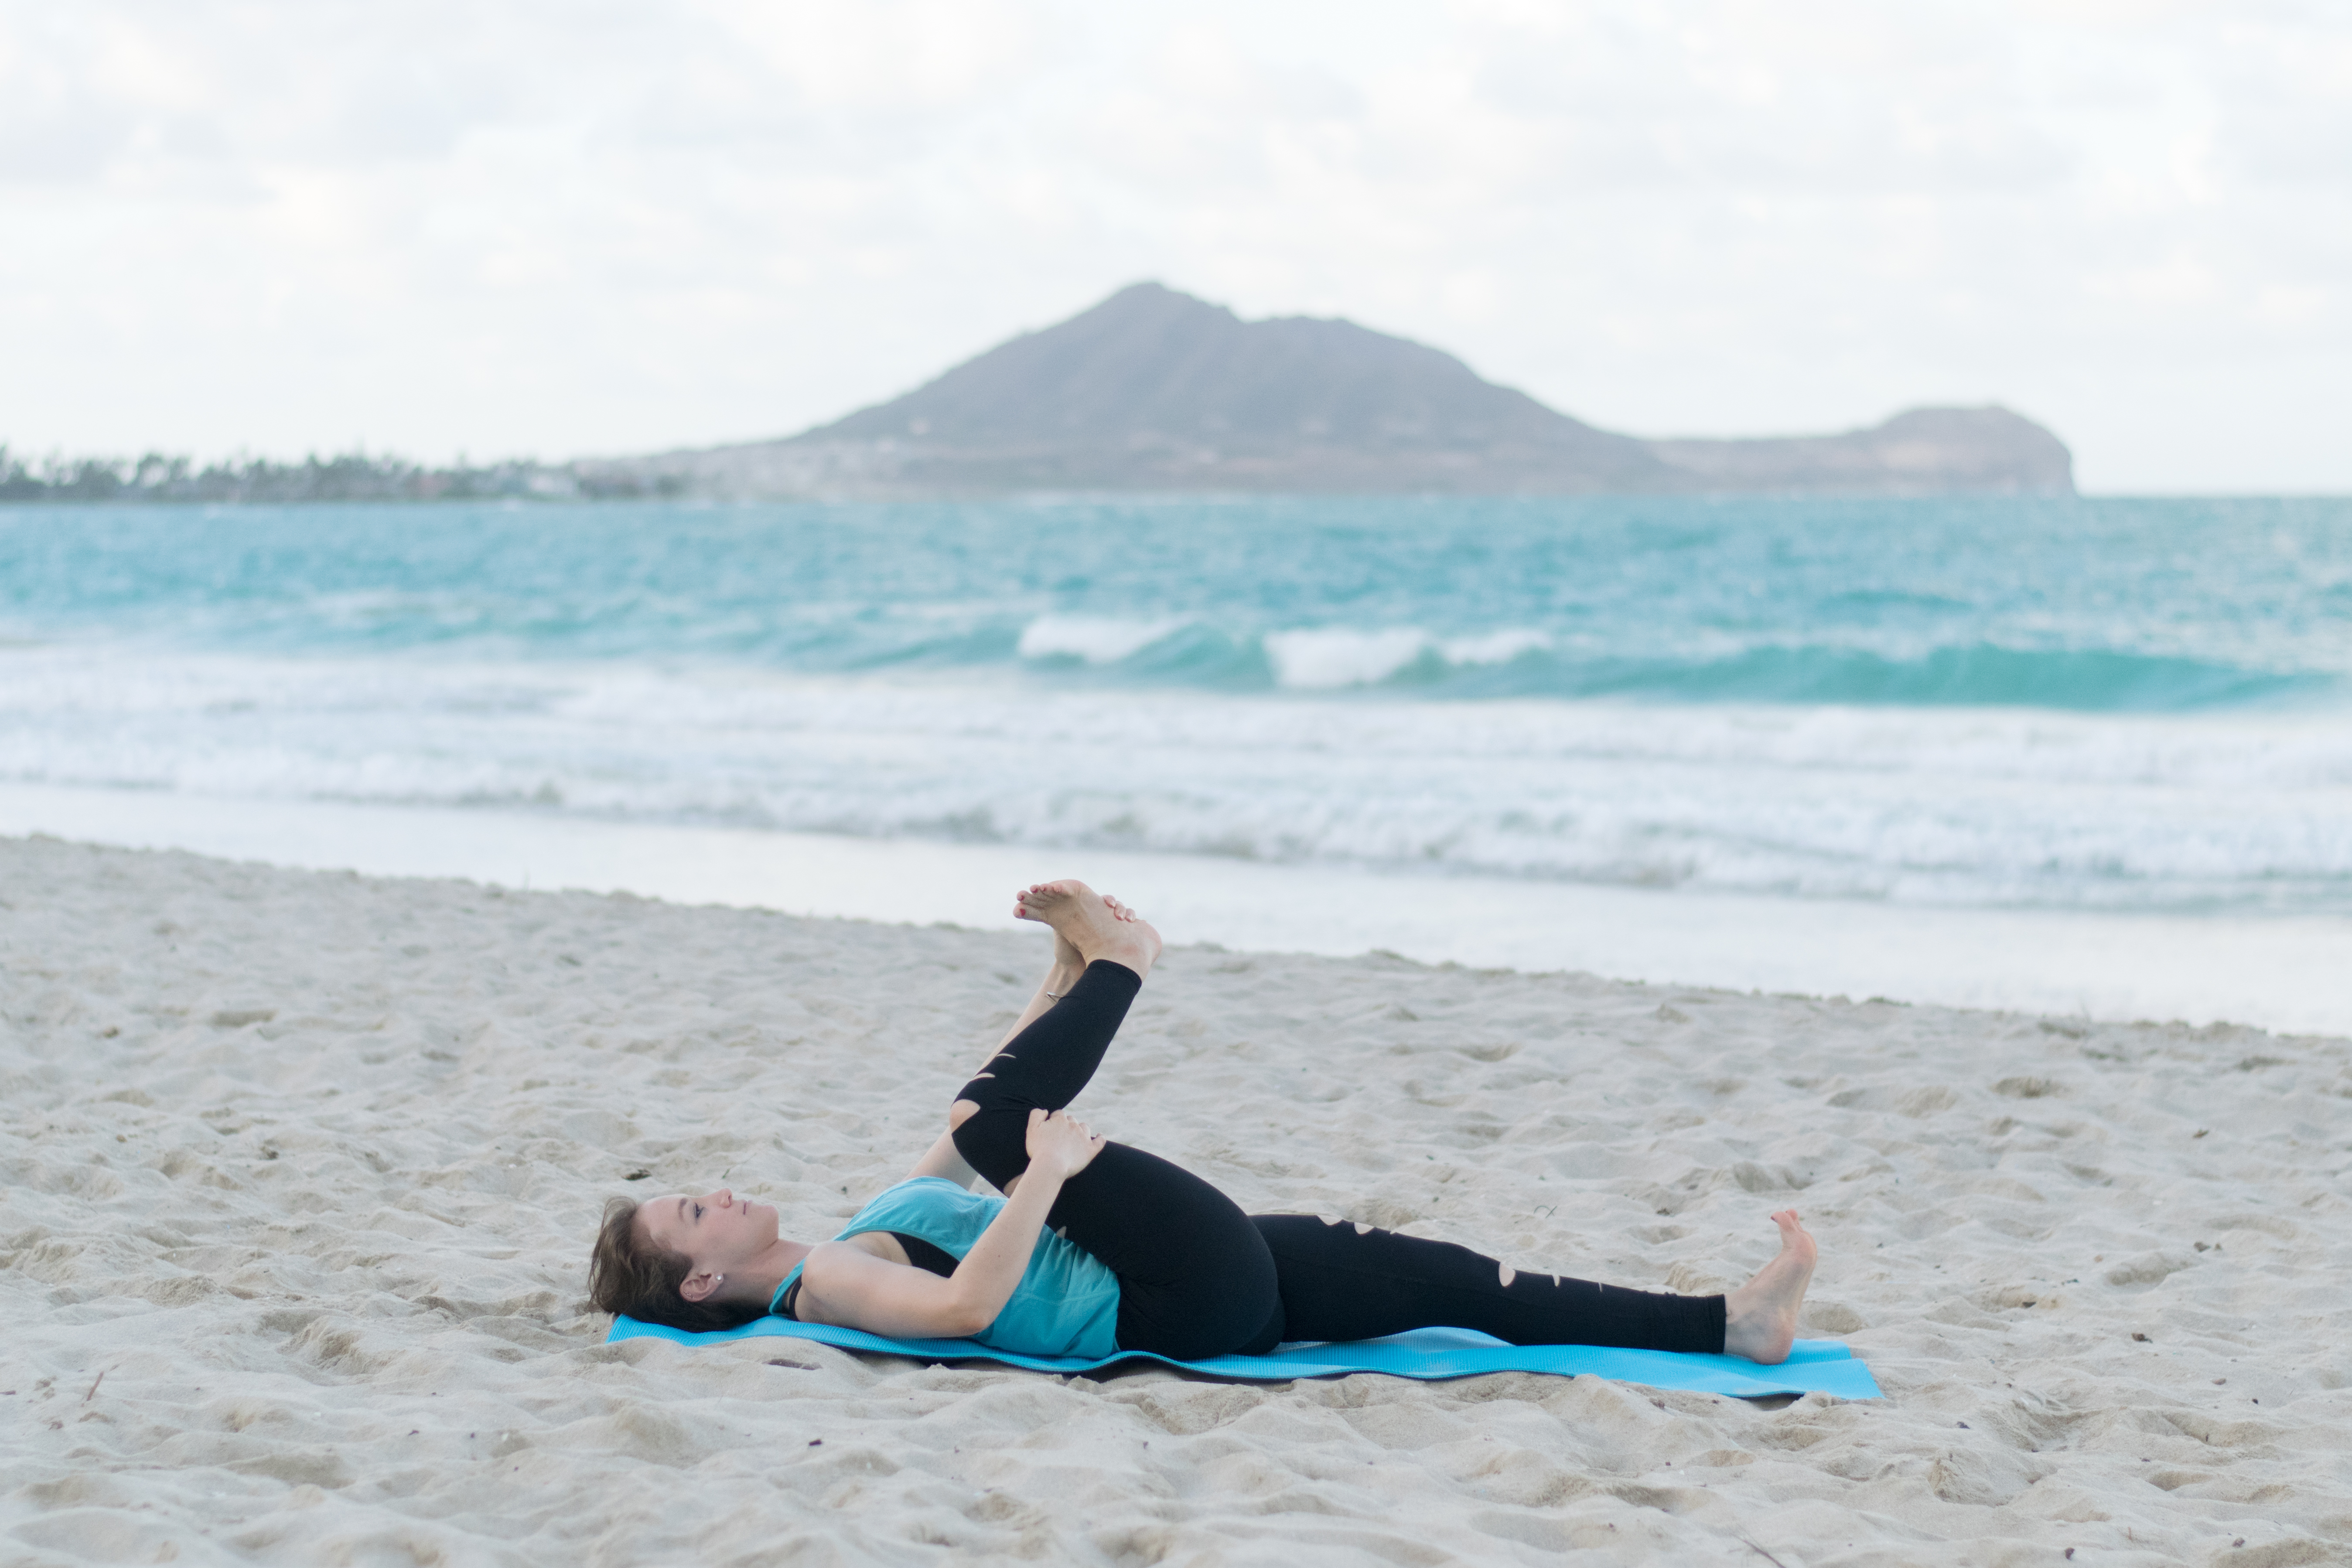
    2 » Trilogy Sanctuary

    Trilogy Sanctuary » Best San Diego Fitness Studios » From the Infinite Embers blog

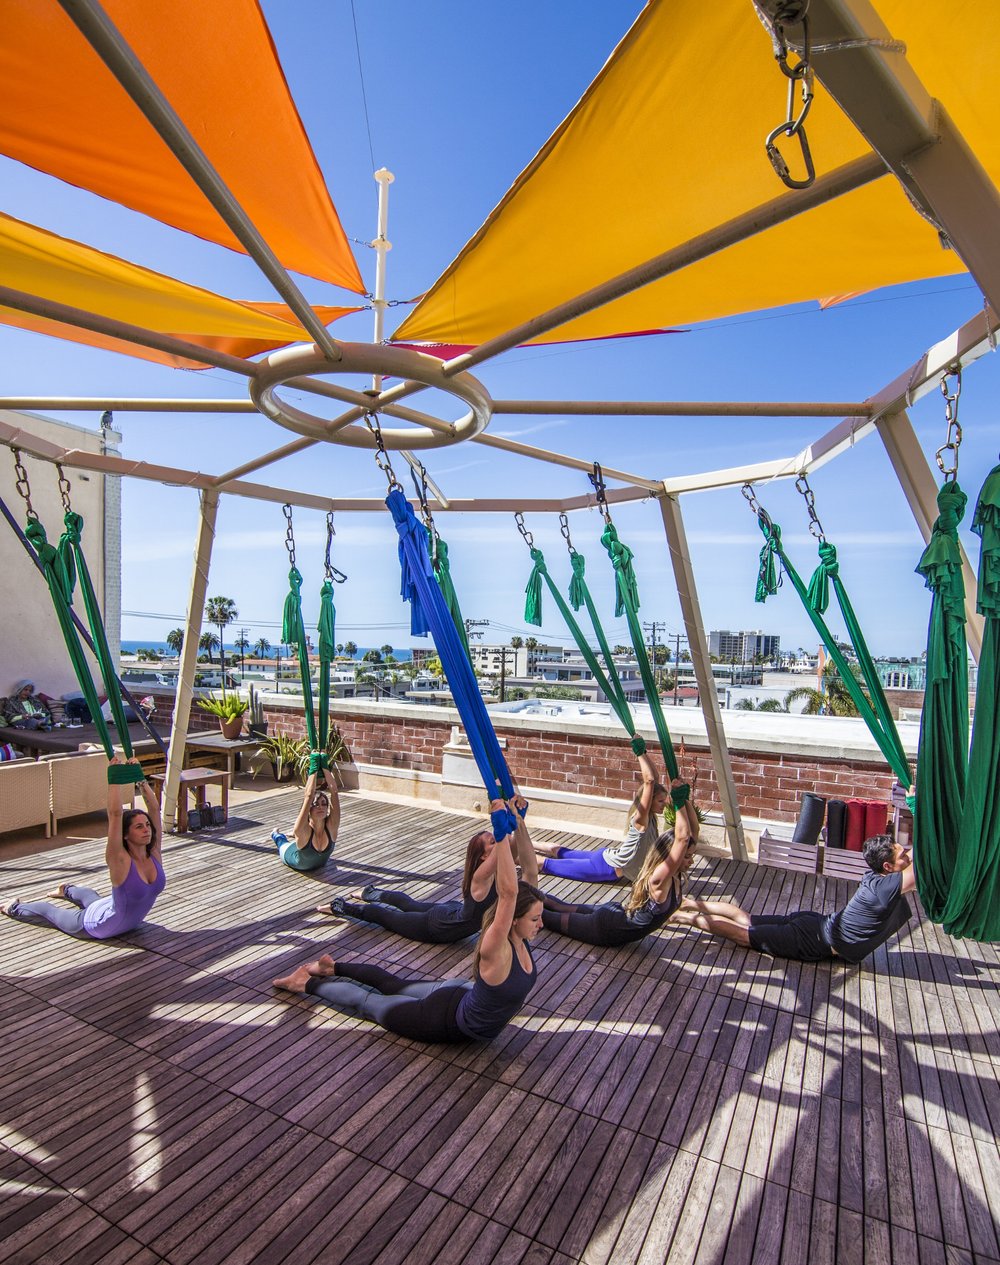
    » Trilogy Sanctuary «

    This stunning yoga studio/vegan cafe/rooftop boutique/event space is a must-see. It’s like the hidden gem of La Jolla, and it really is a beautiful sanctuary to spend a long afternoon working or take a yoga/aerial yoga class. I did my aerial yoga teacher training from Trilogy and taught in both their downstairs Earth Room and upstairs outdoor aerial deck (my favorite!). The Nachos from their vegan cafe are one of my favorite meals (SO GOOD – those and the Perfect Tacos. I dream about them both.). The whole space is really unique and bohemian and a tranquil healing center that offers so much more than just yoga, including Lyra classes and Open Mic events.

    3 » The Dailey Method

    The Dailey Method » Best San Diego Fitness Studios » From the Infinite Embers blog

    » The Dailey Method «

    When I set out to find a barre studio in San Diego after my former studio Pop Physique closed their SD location, I tried everything: Pure Barre, The Bar Method, Barre3, etc. They were all great, and I got a challenging workout everywhere, but I didn’t quite vibe with any of them until I went to The Dailey Method. I was doing a lot of physical therapy for my neck at the time and was focusing on my spinal alignment and posture. I took a class from Ashley, the owner of the San Diego location, and she explained the typical barre exercises I was already very familiar with in a way that made a lot of them finally click for me. The Dailey Method brand focuses a LOT on alignment, so their instructors are top-notch at gently guiding and correcting students with their form. This means that you really get therapeutic benefits from the workout in addition to a sculpted bod, because you’re working your entire body in a way that makes it look good, but also feel its best, too.

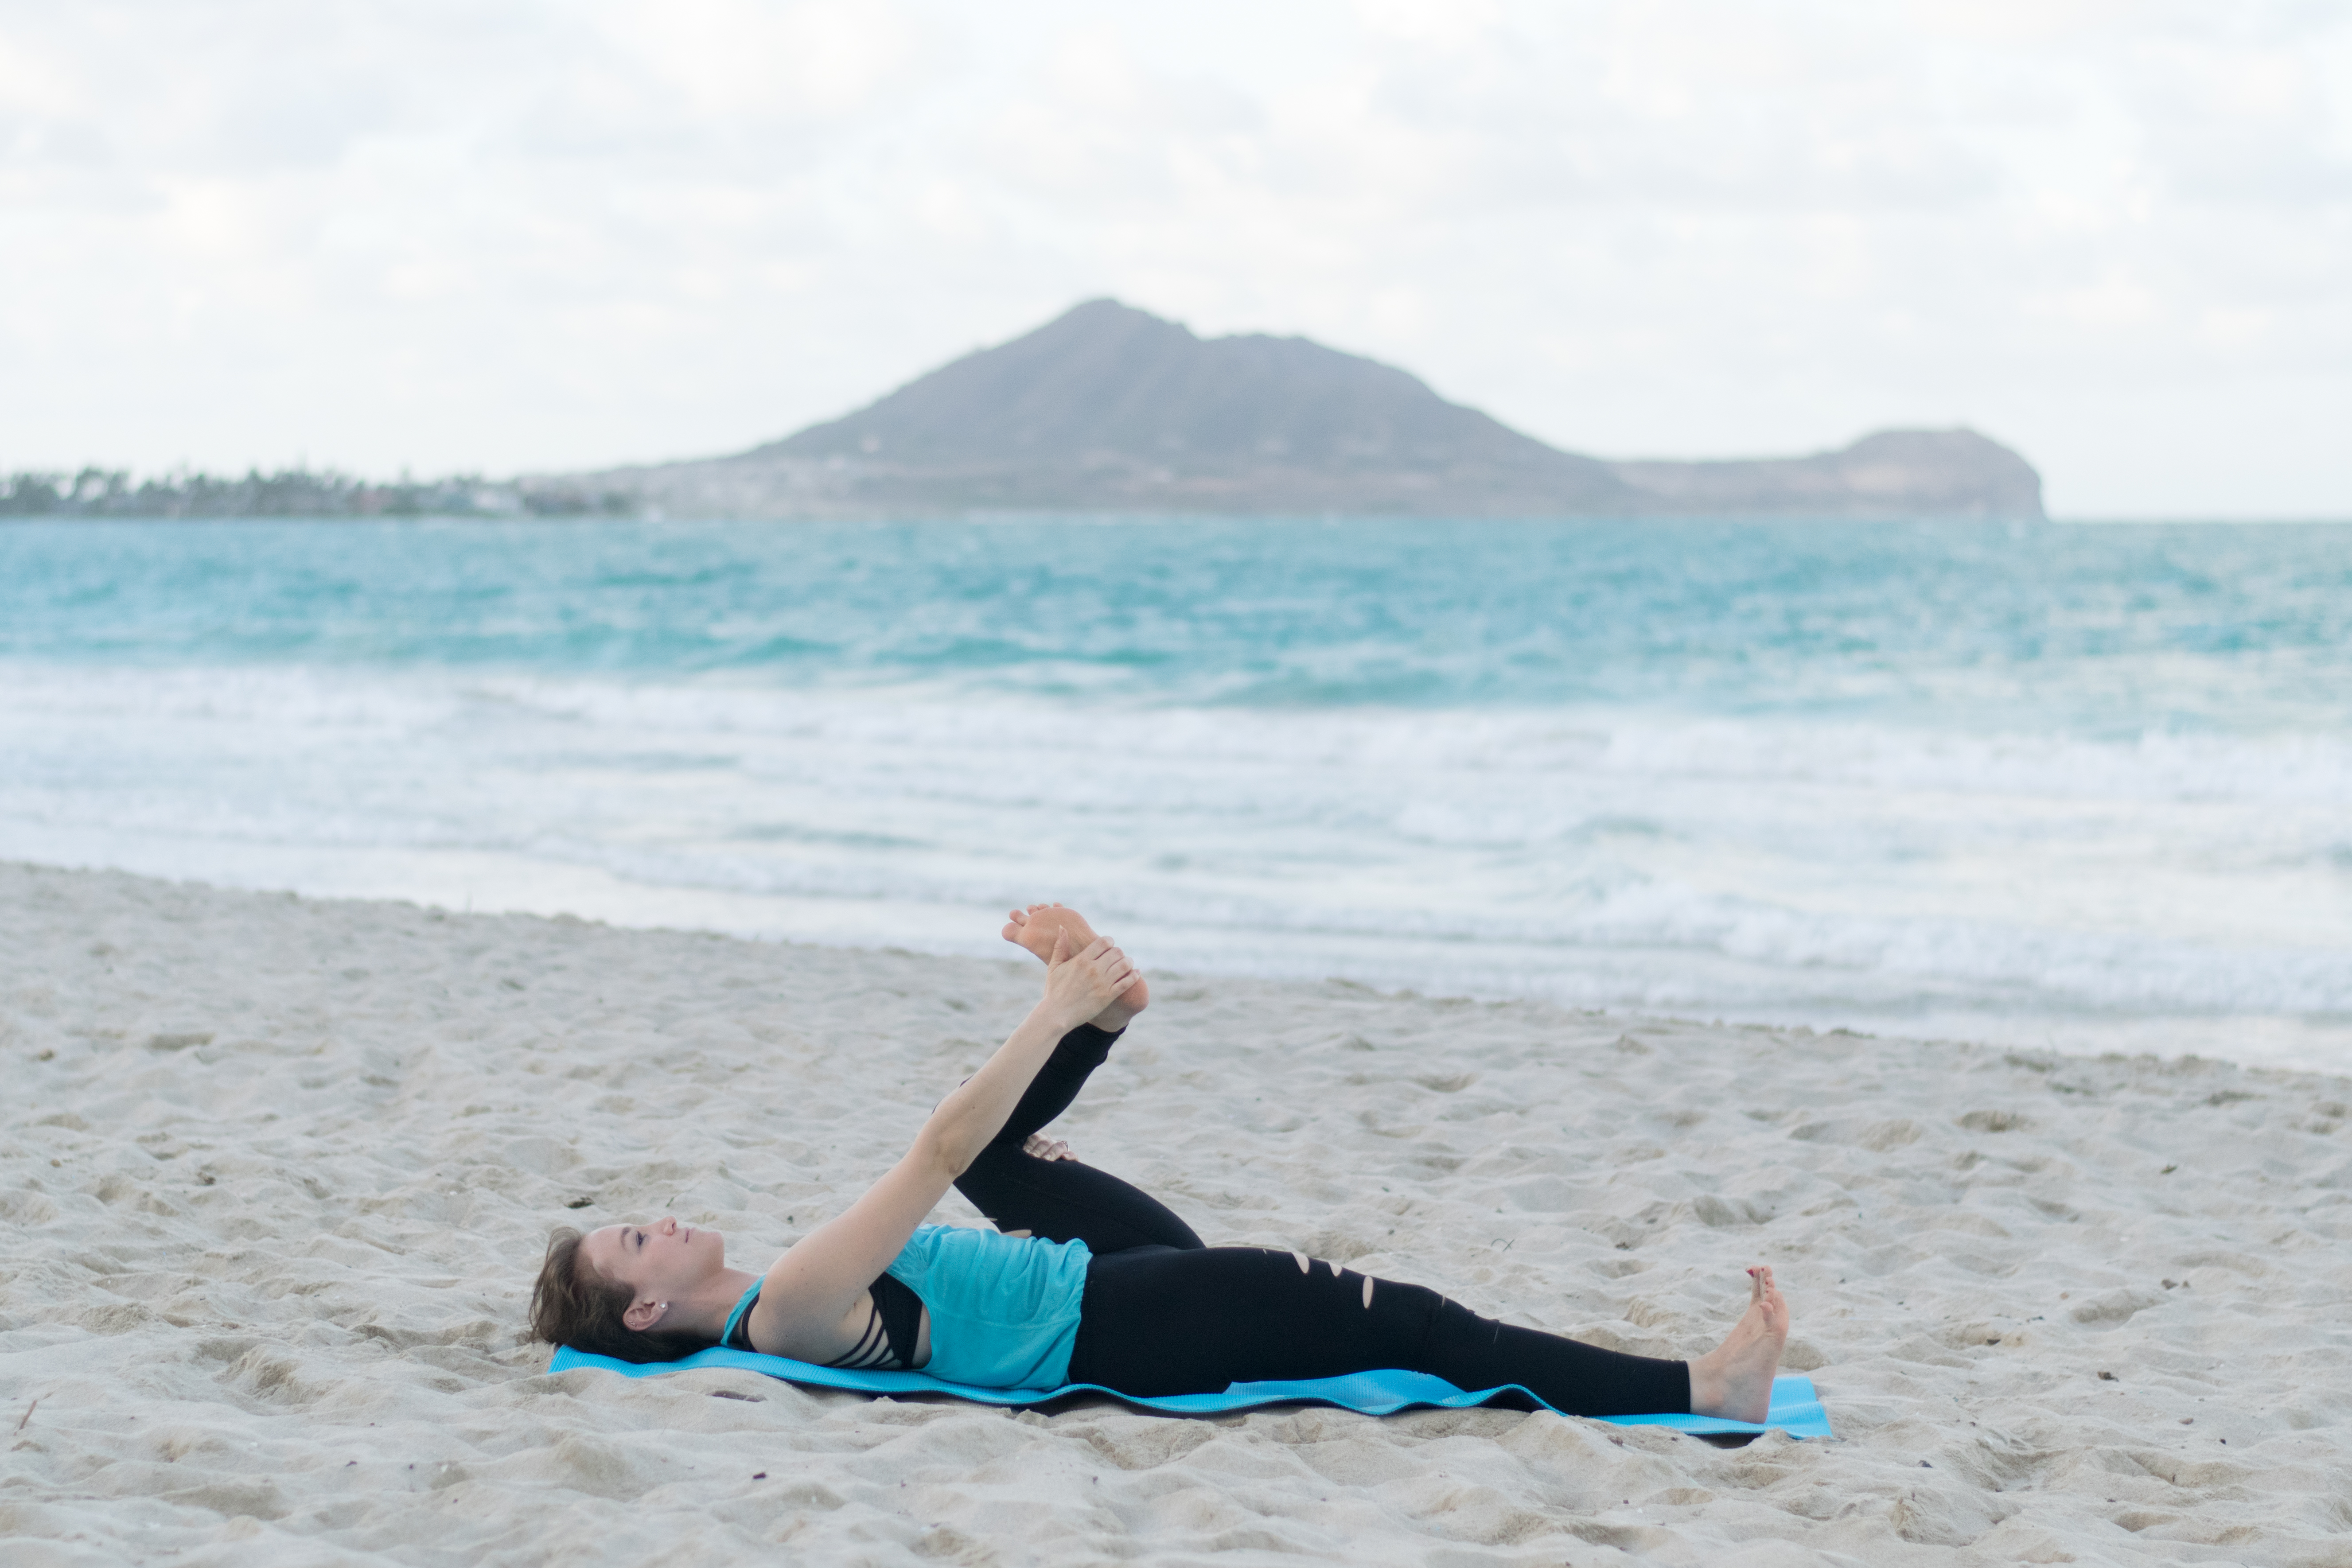
    4 » Elka Yoga & Wellness

    Elka Yoga and Wellness » Best San Diego Fitness Studios » From the Infinite Embers blog

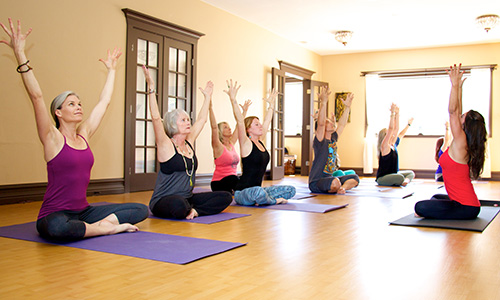
    » Elka Yoga & Wellness «

    Elka Haeckel, the owner of this incredible yoga/aerial yoga studio in Ocean Beach, is the best yoga instructor I’ve ever known. She’s the real deal and such an inspiration to me, which is why I chose to receive my Yoga Alliance 200 hour Yoga Teacher Training from her. It was truly a life-changing decision, and she has been a huge source of inspiration for me throughout my teaching career. Taking one of her classes is a uniquely special experience — she has such a magnetic personality and was the first teacher I ever had who made me actually understand yoga. She incorporates the teachings of yoga with powerful asana practices in a way that is authentic and so transformative. Her Prana Yoga classes are like a choreographed, sweaty yoga power dance. This studio operates 100% from a foundation of love. I adore it and am proud to call it my yoga home!

    5 » Elevate Training 

    Elevate Training » Best San Diego Fitness Studios » From the Infinite Embers blog

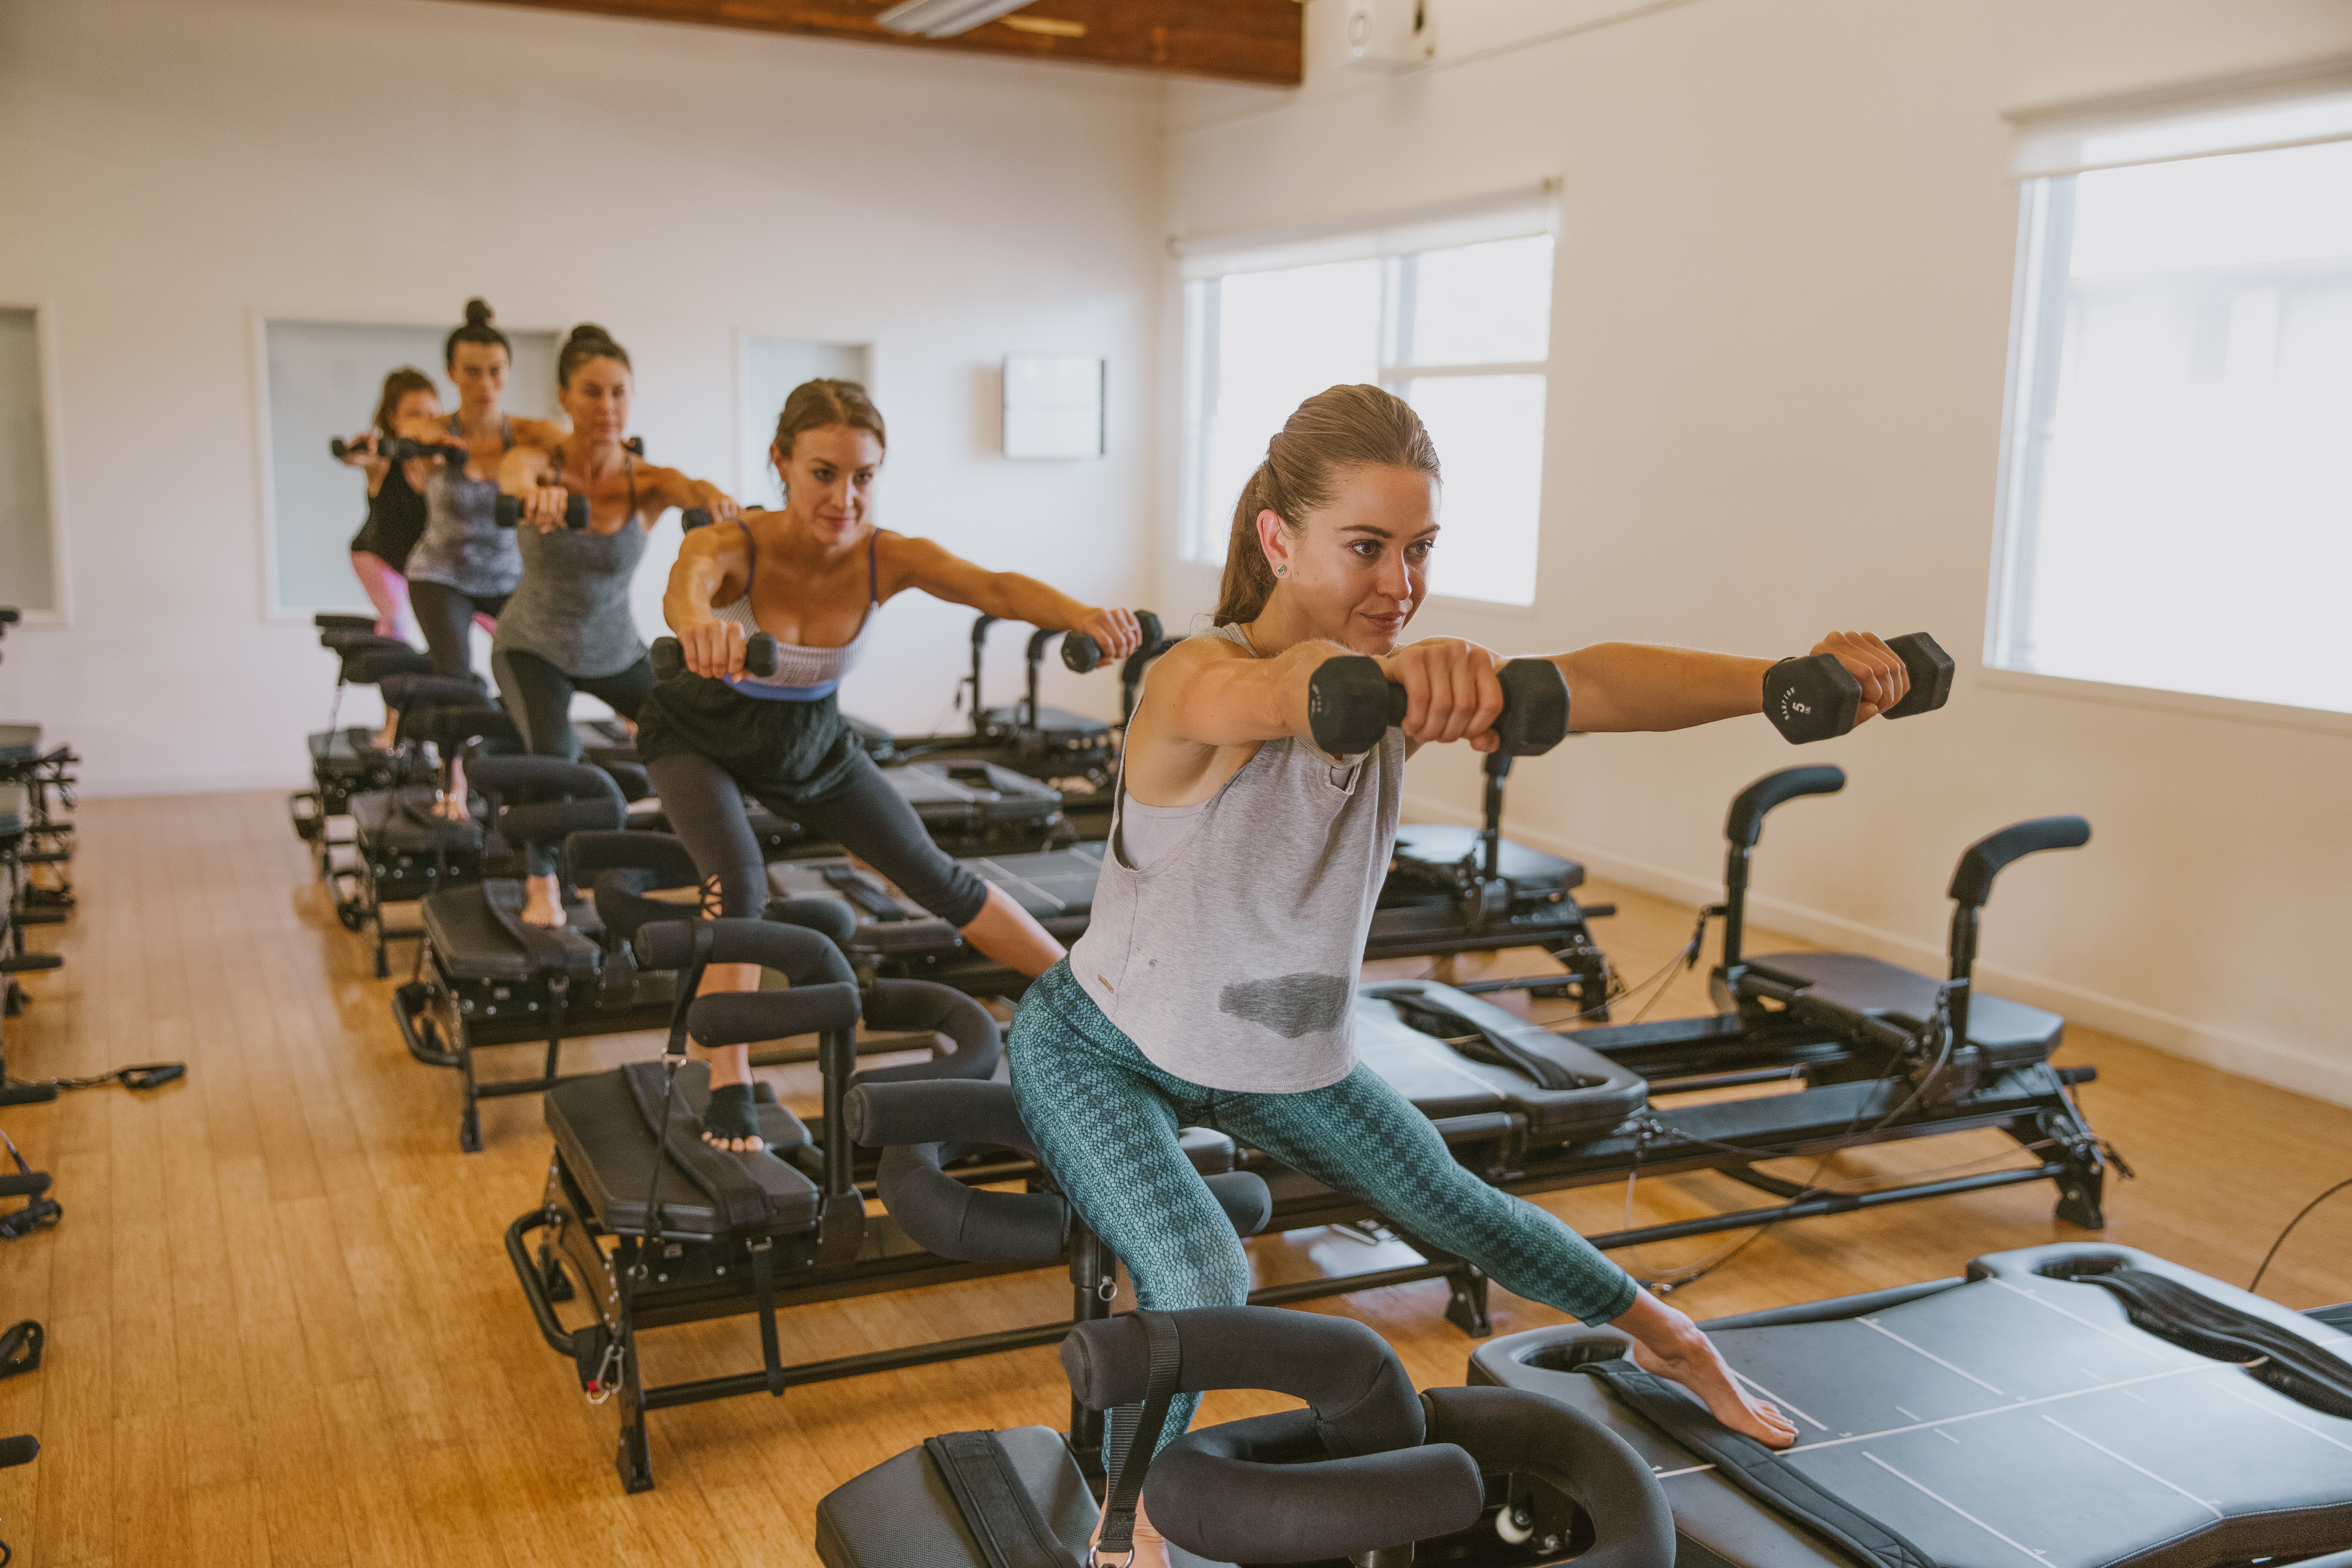
    » Elevate Training «

    Okay, if you want the most effective workout literally POSSIBLE, you gotta check out Elevate, which has locations in both Downtown and Solana Beach. It’s a Lagree Method studio, which means they use the Megaformer, an exercise machine that was modeled after a Reformer and made way more efficient. The goal is to work your entire body in 40 minutes (or less) and push all of your muscles to the point of failure as quickly as possible to get the strongest results. And baby, it WORKS. Like, I’m so sad there’s no Lagree studio on Oahu, because in just a month of doing this 1-2x a week your body really strengthens. The combination of isometric contractions and slow movements on the unstable Megaformer platform means that most moves work a majority of the muscles in your body. The instructors play awesome music and are super motivating, so the time goes by in a blink. It’s hard, but there is no comparing the results! They also offer spin classes that are an awesome way to cross-train.

    Okay, I’m off to some hot tubs in Palm Springs to give my sore muscles a little TLC. Be sure to follow along on Instagram to see my travel adventures! I hope I’ll get to come back to San Diego again soon.

    San Diegans — where do you like to workout? Share you favorite studios with me in the Comments below!

    xo,

    Amy

    SaveSave

  • You Need To Fix Your Spin Form

    You Need To Fix Your Spin Form » From the Infinite Embers blog

    » Top: Puppies Make Me Happy «

    Your spin form probably sucks.

    But it’s okay! Nearly everyone’s does. Mine sucked for a long time, too, before I became an instructor. Even though you’re trying your best and your instructor may (or may not) be giving excellent cues, it’s really challenging to focus on getting through a sprint while also thinking about your spin form.

    I mean, I would weep if I ever saw a photo of me in spin class way back when. When I took my first indoor cycling class way back in 2011, spin kicked my ass. And I know I took all my tension straight into my shoulders and was hunched over my handlebars like a tiny gorilla. Yikes.

    Whether you do indoor cycling or legit road cycling, having good form on your bike is KEY.

    When I teach (and I will be back to guest teach for a week at PURE Indoor Cycling the last week of Oct in San Diego!) I try to talk about form a lot. Like, I maybe talk about it too much. But it’s just the MOST IMPORTANT part of taking a spin class.

    If your spin form isn’t correct, the rest of your workout will be negatively affected as well. But when you have good form, you’ll find you get results a lot more quickly, which makes you stronger and can prevent injuries (bonus: you’ll also be in the best shape of your life, especially if you have a strength-training and stretching routine in addition to doing spin).

    Let’s break down proper spin form:

    You Need To Fix Your Spin Form » From the Infinite Embers blog

    Here’s what you should look like, scanning from the base of your body up to the top:

    1 » Feet are flat + working with equal force.

    As you pedal forward you want to feel your heels pressing down as you lower. Then, focus on pulling your knees up into your chest to bring your feet back up.

    Also, press equally into both feet. SO many people in rhythm-style classes develop a horrible habit of pressing down more forcefully with their right foot in order to stay on the beat. This means that as they ride they’re essentially galloping. This both looks funny AND can really cause a lot of problems because it twists and destabilizes the pelvis.

    I’m speaking from experience here! I developed some pain around my sacrum for a while before I figured out I was unevenly training my legs that way. So it KILLS ME when I see this.

    Seriously.

    I DIE INSIDE.

    Ideally in these classes we’d all alternate leading with both our right and left foot, but that’s unfortunately just not how most studios teach (it tends to create a disorganized uncoordinated mess). So, you must focus on pushing and pulling equally through both your right and left legs.

    And since we’re talking about your feet…

    One more thing – you want your feet to point straight ahead. Check your shoe’s clips to make sure they’re on straight and ask the staff at your gym or studio to adjust them if they’re crooked or tighten them if they’re loose. You don’t want to ride with your foot all twisted or unstable! Again — been there, done that, nursed the aching ankle for a week, etc.

    And, for the love of your arches, buy or rent spin shoes.

    Seriously. Don’t use sneakers in cages. Your feet will feel so much better, I promise. Find out what clips your studio or gym uses – you’ll probably need to buy either the Look Delta or SPD cleats.

    I highly recommend buying your own pair of cycling shoes even if your studio offers free shoe rentals. The shoe will be much sturdier and molded to your foot – and also sharing sweaty spin shoes with other people is just disgusting. I mean really. I worked at the front desk at a busy spin studio for a while before I began teaching and I would never, ever wear those shoes. But that’s just me.

    These are the Pearl Izumi shoes I use and I LOVE THEM.

    2 » When you’re on the downward stroke sitting in the saddle, your knee should be right above your ankle.

    You Need To Fix Your Spin Form » From the Infinite Embers blog

    It should look like this. You want to avoid your knee pushing forward over your toes as that puts a lot of strain on the knee.

    When you’re up out of the saddle, make sure your knees don’t go forward of your toes.

    This is often controlled by the set up of your bike, so if you’ve been measured correctly you should be good to go. I’ll go over how to set up your bike in a future post, but for now please ask your instructor or the desk staff at your gym or studio to help you if you’re ever not sure if you’re positioned correctly or don’t feel comfortable as you ride.

    3 » Your hips are pulled back.

    This will also affect #2 – if you start to bring your hips forward as you ride, your knees will likely start to jut forward of your toes. You want to always think of lining up your hips with the back of the saddle, whether you’re in or out.

    The real trick to nailing your spin form when you’re out of the saddle is to think of holding a squat.

    Do a little squat right now. Ok, great. That’s exactly what you want on the bike.

    Knees are over the centers of your feet, hips are back, and most importantly:

    4 » Your pelvis + spine remain in a neutral position.

    Think of standing with your absolute best posture. Now stay in the same position from the waist up, but hinge forward at the hips, just like a Barbie doll. Bend your knees. Boom. That’s a squat. And that should be you on a bike. From your tailbone to the top of your head, your back should be nice and long and aligned. Your chest and back should feel broad and relaxed.

    In order to keep a strong neutral spine while you spin, you have to engage your core.

    To engage your core, picture someone punching you in the stomach. Notice how you brace your abdominal muscles? Try to hold that for a beat every time you exhale to really use your abs during your ride. This makes spin a killer core workout (really! especially in out-of-the-saddle moves) and will help you get more power out of your pedal strokes.

    5 » Your shoulders are relaxed + neutral. Your head is up.

    Remember, everything is neutral — including your neck. Yeah, it’s hard to understand what to do without looking at the instructor, or maybe you just love watching yourself in the mirror (guilty, I admit it — I’m not even ashamed). But if that means you’re cranking your head up or twisting to one side, you could be setting yourself up for neck pain. So look wherever you must in order to keep your cervical spine happy and neutral, and maybe try closing your eyes.

    That’s one of the my favorite parts about spin – the fact that you can close your eyes and go internal while you do the workout. I’ve found it to be super meditative.

    6 » Your hands are light on the handlebars.

    You Need To Fix Your Spin Form » From the Infinite Embers blog

    When you ride out of the saddle, keep a relaxed, light grip on the handlebars. As soon as you start to clench with your hands, tension rides up your arms, into your shoulders and then into your back. Relax.

    If you’re pushing yourself to the point of holding a death grip, you might want to use that as a sign that you need to back off and rest a little. It should be a challenging workout, but never to the point where you start to tighten up muscles you’re not supposed to be working.

    When you’re in the saddle, push lightly with the palms of your hands into the handlebars. Recruit your abs to help take the weight off your hands. Keep your spine long and neutral and bend your elbows slightly. Don’t curl into yourself – you want to keep your chest open.

    » Pro Tip to Nail Your Spin Form: Before you spin, hold a plank for 1 minute, then do at least 15 squats!

    This helps you get warmed up AND feel all the necessary muscles engage before you get on the bike so they’re easier to tap into once you start your ride. I love to do this before I get on the bike and highly recommend trying it. Just get to the studio nice and early so you actually have room to throw a plank down somewhere.

    » Song Vibes «

    What not to do, haha.

    What’s one thing you can improve in your spin form? I still constantly remind myself to keep my upper body relaxed. It’s hard! Share your struggle with me in the Comments below.

    xo,
    Amy

    This post is not sponsored, but there are affiliate links throughout this post. I genuinely love these products and know you will, too. Thanks for supporting the blog!

    Photos by Matthew Hanley, edits by me

    SaveSaveSaveSave

  • How To Squat With Correct Form

    How To Do A Squat With Correct Form » From the Infinite Embers blog

    The squat is just always going to be one of my favorite workout moves.

    It’s so simple, yet majorly effective. Squat is also a word that if you think about too much starts to sound really weird. (You’re welcome)

    I make sure to throw in a round of squats at least 3 times a week when I train!

    Why squat?

    Squats are amazing because they’re a functional movement — that is, it’s a movement you do in real life. It’s rare that we’re lunging around our houses, but you know you gotta squat to lift up a heavy box.

    A squat is also a compound movement, meaning it involves two or more joints (hips and knees). It also recruits the majority of your muscles. We tend to think of squats just as a booty-building move (and it will help you build up that #peachbutt), but it involves not just your glutes but also all of your legs, core, hips, and back. Hold a weight in your hands while you do it and it might just work almost every muscle group in your body. Stronger muscles means improved physical health and decreased risk of injury — starting to get why I love squats yet?

    There are of course different variations of squats. For example, if I need to drop down to the ground for some reason (like to play with my dogs), I tend to prefer to hang out in malasana (which is a yoga squat that’s fairly deep), instead of sitting (it’s definitely strange). If you can rest in that position comfortably, it’s way better on your back than slumping cross-legged, even if it does look a little odd. In many countries around the world, especially in Asia, that’s just how they hang out. Walk around Bali and you’ll see lots of vendors chilling a couple feet off the ground. They know what’s up.

    (BTW — you should also be squatting to go the bathroom. But that’s for another post.)

    Today I want to talk about the basic bodyweight squat, since that’s the squat most of us know and love/hate.

    It’s a fitness move you’d think everyone would basically do correctly, but you’d be wrong, my friend.

    I have seen some jacked-up squats when I’ve taught them in my classes.

    So let’s go over correct squat form.

    Here’s the right way to do a standard bodyweight squat:

    How To Do A Squat With Correct Form » From the Infinite Embers blog

    • Stand with your feel slightly wider than hips’ distance and slightly turned outwards
    • Push down through your heels so your weight pulls backwards
    • Bend your knees as you pull your hips back and down
    • Keep your back long and in neutral (low back maintains natural curve)
    • Your pelvis should also stay in a neutral position (no tucking!)
    • Keep your chest broad
    • Engage your core
    • As you sink you hips down, only go as far as you can while maintaining your long neutral spine
    • Watch your knees and make sure they do not bend past your toes
    • Also focus on keeping your knees tracking over your 2nd and 3rd toes so they don’t cave in or bow out
    • Grip the floor evenly through all ten toes
    • The goal is to get your hip joint below your knee joint (this position is called “parallel”) — but work up this and only lower as far as you can while maintaining proper form
    • Squeeze your seat when you come back up to standing
    • Do at least 3 rounds of 15 sets
    • You can also up the intensity of your workout by holding your squat down as low as you can for as long as you can, then adding little pulses, moving your hips up and down 1″. Get ready for that booty burn!

    Now here’s what NOT to do:

    Avoid These Common Squat Form Mistakes » From the Infinite Embers blog

    I can’t even stand to look at this one. Like just looking at my back makes me want to scream.

    What’s funny is that I was posing in this horrible Gollum position for this photo when a couple walked by… they must have been so confused watching my husband taking photos of me like this. I like to think they assumed that I was attempting to do this squat as I tried to look super cool on Instagram with this beautiful Hawaiian view and that no one had the heart to tell me that I really sucked.

    This was actually the second round of photos we took showing the bad form, because in the first one I didn’t jut out my knees far enough for it to look wrong. It hurts to do! Guys! Why do you do it?!

    This picture is obviously overly exaggerated, but sadly I actually do see these mistakes quite often when I teach. Thankfully not often all at once though – it’s actually fairly difficult to try to squat this horribly!

    To recap, here’s what’s going wrong in this photo:

    • My spine is rounded forward – and my chest is caved in
    • I’m also hanging my head down so my neck is rounded forward, too
    • My hips are tucked under like a dog with a tail between its legs instead of in neutral
    • I’m not using my core at all
    • My knees are going way too far forward – past my toes!
    • They’re also caving in towards each other instead of staying in line with my feet
    • My weight is forward in the balls of my feet, not my heels
    • I also have my feet too close together and slightly turned in

    And now a video to bring it all together:


    Here I talk through and demonstrate how to do a squat correctly — it’s nice and quick for whenever you need an easy refresher!

    One final note:

    I usually do squats barefoot, but this coral happened to be a bit too sharp for my feet, so flip-flops it was! (They’re Oofos, which are incredibly comfortable and super supportive — here’s a link if you want to buy some! That’s an affiliate link and will help support the blog. I wear these flip-flops every single day and LOVE them.)

    When you do squats barefoot instead of in shoes, it helps you get better grip with your toes and strengthens the muscles in your feet. If you want a way to give them a little TLC after your barefoot workout, I recommend stretching your feet out.

    Do you love doing squats, too? Or is more of a love/hate thing? What do you struggle with the most when doing them? Share your thoughts with me in the Comments!

    xo,

    Amy

  • 10 Yoga Poses You Should Do After Spin Class

    10 Yoga Poses You Should Do After Spin Class » Infinite Embers blog

    Spin class makes you feel like a rockstar.

    I’ve never been able to decide if I love spin or yoga better, to be honest. They’re obviously very different, and I think that’s why I’m drawn to them for opposite reasons – they’re like my fitness Yin and Yang. Spin is high-energy, high-cardio, high effort – and yoga is slow, controlled, strengthening, stretching. In spin you contract. In yoga you expand. But both can be intensely internal and meditative experiences, which is why I love them.

    A little yoga after spin class is just ideal.

    Because spin is so high-intensity, you can help your body recover more quickly and get better results if you take the time to really loosen up your muscles after you’ve just tightened them. Cycling (whether you go legit road biking or traditional indoor spin or my personal favorite, the SoulCycle-esque choreographed dance-party variety) is a fantastic way to workout. It’s such a killer and highly effective form of cardio.

    But cycling does also put your body through its paces. There are a few problems spin presents that we want to be aware of:

    • You’re essentially folded in half at the waist. This shortens your hip flexors, particularly your iliopsoas (aka the psoas), which can cause poor posture and back and neck tension. (This is also one of the reasons why it’s not good to sit for long periods of time.)
    • Although I’d love for your spine to be neutral while you ride (i.e. straight while maintaining the natural curve you have in your low back), in all likelihood, you’re riding hunched like Quasimodo. This rounding in your back can cause more pain and shoulder/chest tightness.
    • You’re cranking your head up to look at the instructor. Or you’re hanging it down toward the floor. Either way, your neck ain’t straight.
    • Since spinning regularly your butt is looking so toned you gotta buy new jeans. (Best problem ever)

    But don’t worry – do yoga.

    If you take the right steps to tend to those issues you can keep on spinning as much as you want. Doing these yoga poses after spin class can dramatically increase your strength and flexibility and improve your hill-climbing game. I know, I know – but none of us have time to stretch. That’s why I made this yoga sequence super short.

    10 Yoga Poses You Should Do After Spin Class » Infinite Embers blog

    » Clearly I exist in a magical world where spin class lets out right onto a Hawaiian beach and you don’t sweat a drop «

    Hold each of these 10 poses for 1 minute (or less if needed).

    Yes, you’re smart – that’s only 10 minutes. That’s only 0.69% of your entire day. I legit just did some math for you on my iPhone to get that percentage because that’s how important I think this is and how invalid your excuses are. I’m asking for less than 1% of your day to help your body and prevent injury. Plus, you just put in all that time and effort to get the most out of your workout – consider this the final, non-negotiable step. It’s totally fine if you don’t do these stretches immediately after your spin class – I know you’re often not going straight home afterwards. Just stay for your class’s cool-down portion (don’t you fucking dare leave early) and then do these stretches whenever you can. They’re a lovely way to wind down before bed.

    Now that I’ve convinced you, let me also remind you that as with any yoga practice, the whole point is to be mindful. You may use your phone only for your timer (but don’t keep holding it in your hand). You might as well make the whole process soothing and indulgent and turn down the lights and fire up some candles. Get real deep with it and pay attention to your body and your mind. Most importantly, remember to breathe deeply and relax as you hold these poses.

    Ready? Here’s your post-spin yoga practice:

    » Bonus: Start with at least three rounds of Sun Salutations to warm yourself up, especially if it’s been a few hours since you cycled. When you get into plank, try to hold for at least thirty counts.

    1 » Low Lunge, aka Anjaneyasana

    10 Yoga Poses You Should Do After Spin Class » Low Lunge / Anjaneyasana » Infinite Embers blog

    • From a straight-arm plank position, step your R foot forward between your hands and lower your L knee down. Adjust if you need to make sure your R foot is directly underneath or slightly in front of your R knee and that you don’t have any discomfort in your L knee (put a blanket under it if you need the cushion).
    • Make sure your hip bones are in line with each other and square, then press them forward to stretch your L hip flexor (your R knee should stay above your ankle).
    • I recommend putting your hands on two blocks, or you may bring them to your hips. Either way, lift up through the top of your head and engage your core to extend through your spine. Think of directing your energy up and squeeze your inner thighs towards each other. This should be fairly difficult, so bring your hands to the ground any time you need.
    • If you want more, reach your arms overhead, lift up even more through the top of your head, then tilt from your shoulder blades into a min backbend. Make sure your neck stays long.

    2 » Lizard Pose, aka Utthan Pristhasana

    10 Yoga Poses You Should Do After Spin Class » Lizard Lunge / Utthan Pristhasana » Infinite Embers blog

    • Bring your hands down to the left of your R foot.
    • Crawl your R foot slightly over towards the right and angle it out about 45 degrees. Your knee should be in alignment over your middle toes.
    • Start to bend your elbows – lower down to your forearms if possible.
    • Keep your back extending long by reaching forward through the top of your head. Keep your chin off your chest and keep your chest broad.
    • If you want to make this harder, curl your L toes under and straighten out your L leg.

    3 + 4 » Repeat Low Lunge + Lizard on the L Side

    10 Yoga Poses You Should Do After Spin Class » Low Lunge / Anjaneyasana » Infinite Embers blog

    10 Yoga Poses You Should Do After Spin Class » Lizard Lunge / Utthan Pristhasana » Infinite Embers blog

    5 » Wide Angle Seated Forward Bend, aka Upavistha Konasana

    10 Yoga Poses You Should Do After Spin Class » Wide Angle Seated Forward Bend / Upavistha Konasana » Infinite Embers blog

    • Sit down and move your legs as wide apart as you can.
    • Tilt your pelvis forward by reaching your sitting bones back.
    • Flex your feet and point your toes and knees up to the sky and try to push outwards through your heels to keep your legs straight.
    • Straighten out your back and reach your hands out in front of you on the ground. Crawl your hands forward and fold forward from the waist while keeping your toes and knees pointing straight up. I highly prefer if you focus on keeping your back straight and core engaged in this position instead of rounding into a little ball with your head just dangling down. I mean really. Keep your upper body as active as the lower half and relax your shoulders.

    6 » Baby Cobra Pose, aka Ardha Bhujangasana

    10 Yoga Poses You Should Do After Spin Class » Baby Cobra Pose / Ardha Bhujangasana » Infinite Embers blog

    • Lie down onto your stomach.
    • Place your hands directly underneath your shoulders.
    • Place your forehead on the ground and make sure your body is straight and you’re pressing down through the tops of your feet. Lengthen out through the top of your head.
    • Try to draw your belly button away from the floor.
    • Without moving your hands, try to pull them down towards your feet.
    • Now keep that muscle engagement in your shoulders and hover your hands off the ground while you try to lift your chest up off the ground into a mini backbend. Keep your neck long, belly button pulling up, and feet pushing down.
    • Hold for a few breaths, then lower. Repeat for the full minute or until you are tired.
    • Side note: The traditional pose is actually done with your hands on the ground, but hovering your hands will strengthen your back more, so that’s what I always do! You won’t go as deep into the backbend, and that’s okay – our goal here is to re-engage your upper back muscles and we’ll be backbending in a sec.

    7 » Bow Pose, aka Dhanurasana

    10 Yoga Poses You Should Do After Spin Class » Bow Pose / Dhanurasana » Infinite Embers blog

    • Now for our full backbend: if you know you have back problems, you might prefer to skip this one. But the key to prevent dumping into your low back is to keep trying to lift your bellybutton away from the floor. It probably will barely move, but you want that core engagement.
    • Stay lying down and bend your legs. Reach back and grab onto your ankles.
    • Push your tailbone down towards the floor to keep your lower back long. Try to actively relax your glute and back muscles and focus instead on stretching out the front side of your body.
    • Extend through the top of your head, pull your navel in, and lift your chest and knees off the ground.
    • Push your feet into your hands and your hands into your feet.
    • Make sure your knees stay hip-width in distance. (Pro tip: Try squeezing a block between your inner thighs. This will engage them and keep your knees aligned with your hips.)
    • Keep the back of your neck long.
    • Hold for a few breaths, then lower. Repeat for the full minute or until you are tired.
    • End this pose by lying on your stomach, forehead on the ground, arms by your side. Bend your knees and windshield wiper your feet side to side to loosen up again through your low back. If needed, rest in Child’s Pose (focus on the rounding of your spine to counter the backbend.)

    8 » Bridge Pose, aka Setu Bandha Sarvangasana

    10 Yoga Poses You Should Do After Spin Class » Bridge Pose / Setu Bandha Sarvangasana » Infinite Embers blog

    • Lie down on your back.
    • Bend your knees and place your feet onto the ground so they’re hip’s distance and parallel.
    • Keep your arms long by your sides and your graze straight up to the sky. (Note: it is very important that you not turn your head once you get into Bridge Pose, so keep looking up!)
    • Push through your feet to lift your hips up as high as you can.
    • Keep your knees in line with your hips. (Pro tip: Bring that block back between your inner thighs. Blocks are the best.)
    • Relax your glutes and back while puffing your chest up to the sky.
    • Without actually moving your heels, try to pull them towards your head. Hello, hamstrings!
    • If you’d like more, shimmy your shoulder blades underneath you and clasp your hands, interlacing your fingers.

    9 » Supine Pigeon Pose, aka Supta Kapotasana (Variation)

    10 Yoga Poses You Should Do After Spin Class » Supine Pigeon Pose / Supta Kapotasana » Infinite Embers blog

    • Stay lying down. Pull your R knee into your chest. Start with your L leg bent with your foot flat on the floor, as it was in Bridge Pose.
    • Hold onto the back of your R thigh.
    • Flex your R foot and lift it up away from your R thigh as much as you can, aiming to bring your leg into a 90 degree angle.
    • Rotate from your hip to try to bring your R foot towards your L shoulder. Keep your leg in that same 90 degree position with your foot flexed – don’t twist your knee. If it’s easily within reach, grab onto your R ankle with your R hand (keep the L hand on the thigh) to help guide your leg.
    • Now pull your R knee slightly across your body towards your L shoulder. You should feel a stretch in your R outer hip.
    • Keep your shoulders down and relaxed on the ground and maintain the natural curve of your low back – no rounding!
    • If you want more, try to straighten your L leg out onto the ground. Keep that foot flexed as well and point your toes and knee up to the sky.

    10 » Repeat Supine Pigeon on the L Side

    10 Yoga Poses You Should Do After Spin Class » Supine Pigeon Pose / Supta Kapotasana » Infinite Embers blog

    » Bonus: End with a long, juicy Savasana. Relax – you earned it!

    How many of you take spin class or do outdoor cycling? What’s your favorite kind? And – be honest – do you usually stretch afterwards? Let me know in the comments! 

    xo,

    Amy

  • September 2017 Spin Playlist

    September 2017 Spin Playlist » Infinite Embers blog

    Anyone want a free spin playlist?

    Good! You’re in the right place. In fact, I’ve got not one, but TWO Spotify spin playlists for ya.

    But first, a little update – I got kinda very down this week. Just feeling very isolated and missing home. As much as I love Hawaii, I’m often anxious for time to pass so I can return to Cali.

    BUT I don’t enjoy being a Debbie Downer so I joined Bumble BFF to meet some friends out here! I had my first “date” last night with a rad chick named Evie. It was a lot of fun and I loved her!

    Definitely check out the app if you’re feeling a bit lonely in the friend department. It’s a fast and easy way to get connected with other women who are also looking for friends. But maybe tell your husband first? Mine nearly had a heart attack when a Bumble notification flashed on my phone! haha If you want more tips on how to survive moving to a new city, check out this blog post.

    Now the good stuff: spin playlist time!

    So honestly the main reason I miss SoCal so much is I miss spin. I LOVE IT SO MUCH. Thankfully whenever I go back to visit I still get to guest teach at my former studio, PURE Indoor Cycling in San Diego. Like seriously, I LIVE for those trips. If you’re in San Diego, definitely go check PURE out! AND I’ll be there the final week of October for another round of guest teaching, so be on the lookout for that!

    I love to play the latest and greatest new releases in my classes.

    I never use the same spin playlist twice and try to focus on the current best (in my opinion) songs that have come out in the past month or so. It’s everything I’m listening to and loving at that moment, which is always new. That’s just my personal preference, because whenever I go take a spin class, I’m mentally taking notes the entire time hoping to discover new music.

    I’m a MUSIC PSYCHO. I love music. I can/do spend endless hours going down a Spotify rabbit hole just listening to new music and hunting out artists I’ve never heard. So I think of my classes as like a radio station playing the best in new music. But I totally do throw in older songs to shake things up when I’m teaching regularly. You’d be surprised how much work it actually takes to build a spin playlist – it’s something clients don’t really know.

    We fitness instructors spend a LOT of time on putting together original playlists.

    Or at least they should if they’re good, I should say. You can tell when an instructor is just streaming Pandora or using one of those 45 min nonstop covers of hit songs but like from the 90s… Anyone know what I’m talking about? (That’s the kind of spin that currently exists on the island, which is why I’m not currently teaching, btw. It’s awesome if that’s your thing! But it’s not my thing.) They’re just not as passionate about it. Some studios have rules against instructors using their own music, and I think using a company-wide playlist really cheats the class out of an awesome experience.

    Anyway, I don’t really limit the songs in my spin playlist to a specific genre (I love EDM + techno pop though), but they’re obviously all very upbeat, high energy songs. Then I arrange the songs by BPM to structure a really challenging class. I also want my songs to kind of tell a story and create a sonic experience.

    I’ve loved so many songs lately that I decided to make two playlists for ya this month. I use Spotify and post all my class playlists (and tons of other awesome playlists for every mood) on my account, so feel free to stalk me a little!

    My favorite kind of spin is the Rhythm style, where you ride to the beat of the music, do moves on the bike, and have a kind of emotional experience through it all.

    Think SoulCycle. So I build my playlists according to that type of “non-traditional” spin class. Totally cool if that’s not your thing, but I’m hoping this can help out my fellow dance-on-a-bike spin instructors out there and anyone who loves that style but doesn’t have access to a group glass.

    This is a great way to get a KILLER workout by yourself!

    Since I don’t have a spin studio to go to out here, I bought a used Schwinn spin bike of my own off of Craigslist for $300. My husband and I take turns listening to my most recent spin playlist and doing the whole class on our own. It’s actually a ton of fun!

    And before our bike arrived with the rest of our stuff (I had to spend the first month here living in a house with only a mattress. It was… liberating?), I went to a local gym. Most larger gyms have spin-style bikes out on their floors with the rest of the cardio equipment (or they sometimes are tucked in a corner, ask at your gym if you can’t find it! Do not use a recumbent bike!). You kind of have to be willing to not give a shit what you look like if you plan to do push-up/tap-backs on your bike in front of everyone slowly moving on the ellipticals behind you while watching Bachelor in Paradise. But once you put on your headphones and close your eyes and start riding, you’ll feel so free. It’s incredible.

    But of course, remember that you’re responsible for your health and safety when you work out, so I really only recommend the following classes for experienced riders. (fyi – here’s my disclaimer)

    Here’s how to do use each spin playlist:

    Your goal is to ride to the beat of the music (always with enough resistance that this is slightly challenging to do). You’ll do the move listed next to the song whenever the chorus drops. So it helps to maybe listen to the playlists and get familiar with the songs beforehand. You can ride in or out of the saddle (I ride primarily out). Make sure you’re watching your form!

    Each class is 45 minutes long. Remember to push yourself but to always listen to your body. And have FUN!

    If you have any questions about anything at all, please comment and I’ll explain anything you need!

    September Spotify Spin Playlist #1

    Click here to open the playlist in Spotify.


    The Breakdown:

    1 » Silent Skies » Drop Elbows Straight Down

    2 » Sorry Not Sorry » Push Elbows Out then In

    3 » 2U Remix » 2 30 second Sprints (1:58-2:28 + 3:19-3:49)

    4 » Text Ur Number » Push-Up/Tap-Backs (push elbows out then slightly lunge hips back until you lightly tap the back of the saddle with your booty)

    5 » Let ‘Em Talk » Tap-Backs (if out of the saddle) OR Triceps Crunches (drop elbows straight down while in the saddle)

    6 » The Man » Figure 8s (move your hips to back of your saddle, then the front, moving your torso side to side like you’re tracing a figure 8)

    7 » Feel Good Remix » 2 30 second Sprints (1:06-1:36 + 2:45-3:15)

    8 » Your Song Remix » Weights (grab a couple hand weights and do whatever upper body exercises you like – you can get off the bike or stay on, sitting upright in the saddle)

    9 » What Would I Change It To » Just ride. (no fancy moves – just reflect)

    10 » Dawn » 1 60 second Sprint (I know – 1:14-2:14) followed by 1 45 second Sprint (4:07-4:52)

    11 » The Louvre » Stretch (seriously – take a couple minutes and DO IT)

    12 » We Did It » A song to make sure you walk away from your workout feeling like the badass you are.

    September Spotify Spin Playlist #2

    Click here to open the playlist in Spotify.

    The Breakdown:

    1 » Silence » Drop Elbows Straight Down

    2 » All My Love Remix » 2 30 sec Sprints (1:16-1:46 + 2:48-3:18)

    3 » Look What You Made Me Do » Travels (move hips to back of saddle for two counts then forward to the front of the saddle for two counts)

    4 » Falls » Push Elbows Out then In

    5 » You Don’t Do It For Me Anymore » A Waltz! Crunch side to side every count of three.

    (This is a little tricky. Let’s break it down. The counts go 1 2 3, 1 2 3. It does help if you’ve ever learned how to dance a waltz before, but you’ll eventually get it. Normal counts in music go 1 2 3 4 5 6 7 8, so we do moves based on 2 or 4 counts. That’s totally different in a waltz, so stick to those counts of 3. You’ll step Right Left Right, Left Right Left, Right Left Right, Left Right Left, over and over again. It does actually help to say that out loud, and emphasize that first beat. Then, when the chorus hits, you’ll do an oblique crunch to that side with your torso, dropping that elbow down. So you’ll crunch Right (2…3…), Left (2…3…) and so on. If that’s totally confusing just focus on nailing that dance with your feet.)

    6 » No Limit » Tap-Backs (if out of the saddle) OR Triceps Crunches (drop elbows straight down while in the saddle)

    7 » Da Da Ding » Figure 8s (move your hips to back of your saddle, then the front, moving your torso side to side like you’re tracing a figure 8)

    8 » Jealousy » Push-Up/Tap-Backs (push elbows out then slightly lunge hips back until you lightly tap the back of the saddle with your booty)

    9 » Space Jam » 2 30 sec Sprints (1:18-1:48 + 2:26-3:06)

    10 » Wild Thoughts Remix » Weights (if you’re on your own, grab a couple hand weights and do whatever upper body exercises you like – you can get off the bike or stay on, sitting upright in the saddle)

    11 » Younger Now » Just ride. (no fancy moves – just reflect)

    12 » Attention Remix » 1 30 sec sprint (1:10-1:40) followed by 1 40 sec sprint (2:25-3:05)

    13 » I Could Fight On A Wall » Stretch (seriously – take a couple minutes and DO IT)

    14 » Show Of Hands » A song to make sure you walk away from your workout feeling like the badass you are.

    Let me know what you think if you try out one of these playlists! Any song requests for next month? Holler at me in the Comments!

    xo,

    Amy